Showing posts with label Ganesh Chathurthi. Show all posts

Wednesday, September 13, 2023

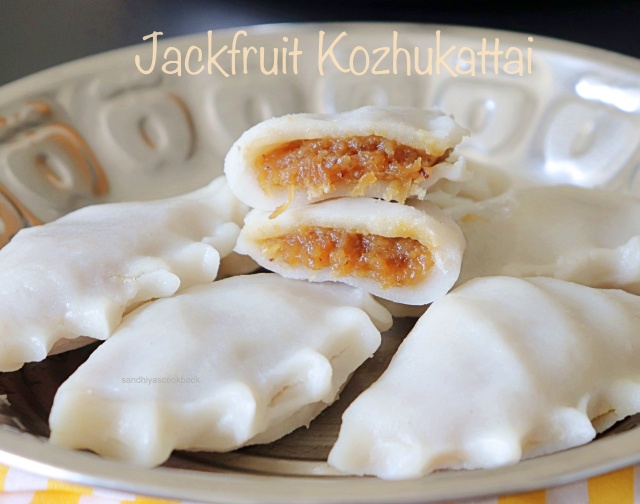
Palapazham Kozhukattai | Jackfruit Kozhukattai

Palapazham Kozhukattai / Chakka Kozhukattai, a delicious stuffed kozhukattai made with the jackfruit & coconut filling. 
I'm a big fan of jackfruit and whenever i see a jackfruit at the grocery store(which is very rare here in Canada), without a second thought, i would pick it up.  I like to eat jackfruit as it is, so making dishes with jackfruit is very rare in my  kitchen. 


One day, the jackfruit that i got was very less sweet so it was sitting in the refrigerator for a few days without anyone touching it, hence i had thought of making this kozhukattai which i knew from a friend. To my surprise, it was so good and i simply love the jackfruit flavor in the kozhukattai. 

From then onwards, this kozhukattai became a regular in my kitchen. If you too like jackfruit flavor, then definitely give a try on this delicious kozhukattai.


Before moving on to the recipe, let's see some FAQs about the mothagam in general.

Why can't I shape the modak / mothagam ?
Dough consistency is the key to making modak shapes easily. There are a couple of things to be taken care of for making the dough. Those are 
  • Rice flour should be fine enough such that adding hot water into the flour makes it almost cooked. 
  • Almost cooked rice flour is pliable and easy to make shapes. Otherwise you can't make shapes and the dough would be easily breakable. 
  • Water should be boiled for making the dough.
  • Grease your hands well to avoid the dough sticking to your hands while shaping.
  • If you're a beginner, buy a modak/mothagam mold, it will do your job a lot easier. 
Why do my modak/mothagam get cracked after steaming?

Steaming for a longer time would make the modak crack on the outer layer. Since the dough is almost cooked already, there is no need to cook for a longer time. Just 5-7 mins of steaming is enough. 

Palapazham Kozhukattai | Jackfruit Kozhukattai

Preparation Time : 15 mins | Cooking Time : 15 minsServes :
Recipe Category: Sweet | Recipe Cuisine: Indian
Palapazham Kozhukattai, chakka kozhukkatai, jackfruit kozhukattai,Jackfruit recipes, Kozhukattai recipe Palapazham Kozhukattai / Chakka Kozhukattai, a delicious stuffed kozhukattai made with the jackfruit and coconut filling.
Ingredients
For outer layer
Rice flour - 1/2 cup
Sesame oil - 1/2 tsp
Salt - a pinch
Boiling water - little less of 1/2 cup
For Stuffing/Pooranam
Jackfruit - 7
Jaggery - 1/3 cup
Grated Coconut - 1/2 cup

Procedure

First let's make the stuffing/pooranam. Take the jackfruit and remove the seeds and place it on the steamer basket and steam it for 3-4 mins until they are soft.
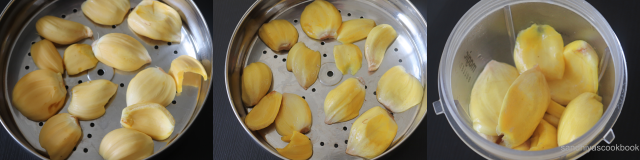

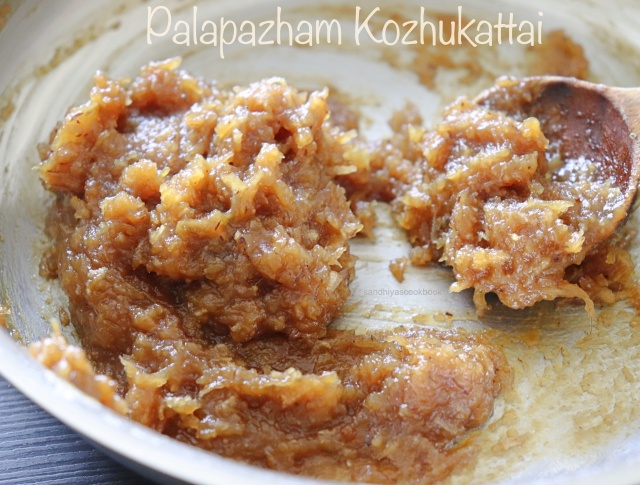
Let them cool a bit and grind into smooth puree. In a sauce pan, add the jackfruit puree, coocnut and jaggery. Give a quick mix.
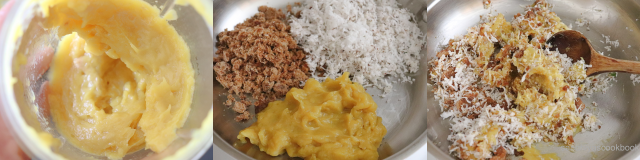
Turn on the heat and cook the mixture till it leaves the sides of the pan. Let it cool down completely.
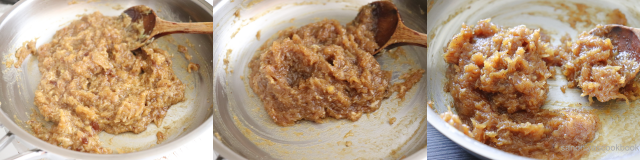
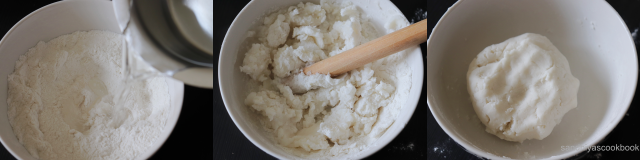
Now, for the outer layer, take the flour in a bowl, add sesame oil and salt. Give a good mix. 
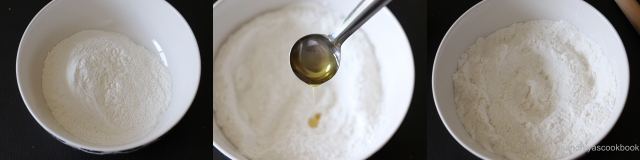
Pour the hot water into the flour and make a soft dough. Keep it aside for 5 mins.
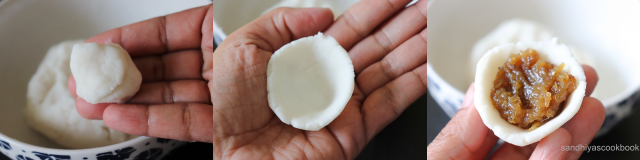
Take a small portion of dough and make a smooth ball. Grease your hand with oil and then gently press the dough with your finger and form a small disc. Fill the disc with the pooranam/jackfruit stuffing. 
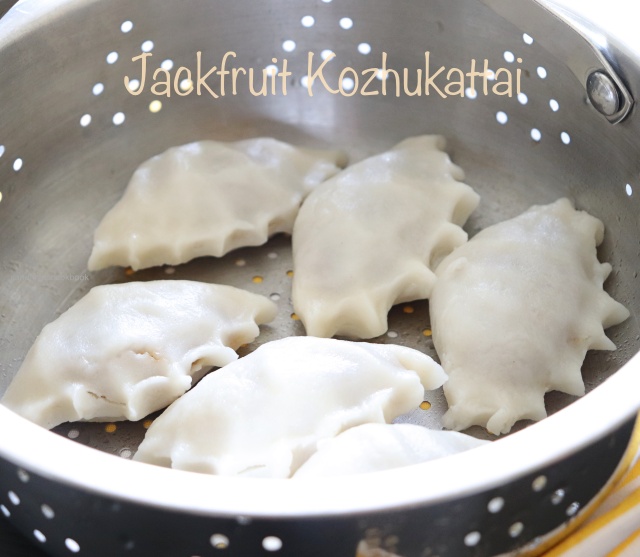
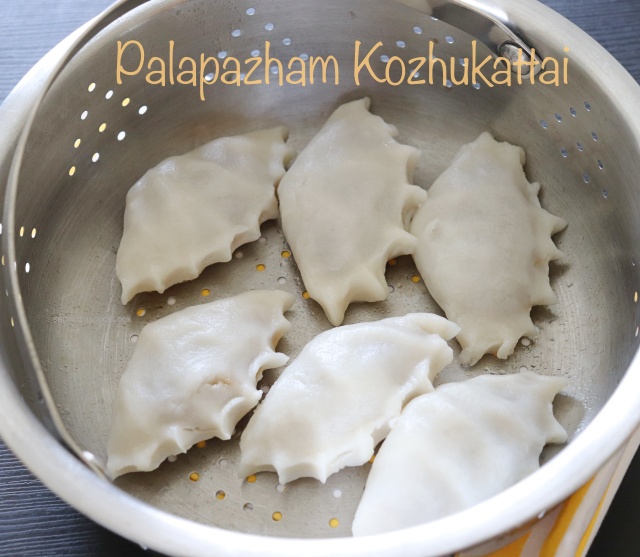
Next close the edge and then pinch on the edges to form a nice rim. Place it on the steamer basket and steam it for 4-5 mins. 
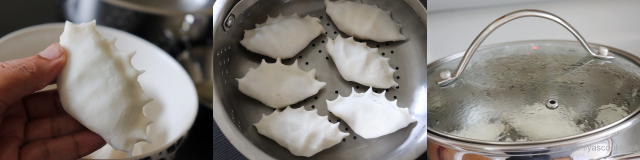
Delicious Jackfruit Kozhukattai / Palapazham Kozhukattai is ready.

Related : How to make Jackfruit Payasam / Chakka pradaman

Notes:
  • Depends on the sweetness of the jackfruit, you may need more or less of jaggery.
  • Sesame oil gives great flavor to the outer dough.
Continue Reading »

Tuesday, September 11, 2018

Home made Ganesh idol | Vinayagar idol | Pillayar idol with Kozhukattai dough

Home made Ganesh/Vinayagar idol, an easy to make ganesh idol at home with the kozhukattai/modak dough. After being inspired  by a  lot of feeds from the social media, here's my take on home made ganesh idol. 

This is such a simple procedure to make ganesh idol with easily available ingredients at home and also its environment friendly. Here i have used two different colors to make it look more vibrant and colorful. 

But you can make without any color also.It's really up to you how you wanna make your ganesh idol. Now let's check out how to make the cute pillayar with kozhukattai dough.

Before check out on how to make Ganesh idol, let's see the FAQs 

How long does it stay good ?
It stays good for about 24 hrs. After that, the dough started to dry out and like a clay idol, it would get some cracks. 
It all depends on the moisture in the dough and humidity in your place. So I would recommend making this idol a couple of hours before doing pooja. 

What do I do with the idol after doing the pooja ?
Next day, I dump the idol in the water and let it dissolve completely and then discard it. You can pour the water over your plants or drainage.
 

Home made Ganesh idol

Preparation Time : 20 mins | Cooking Time : 0 minsMakes :
Recipe Category: Homemade Ganesh Idol | Recipe Cuisine: Indian
Homemade Ganesh Idol, Vinayagar Idol using Kozhukattai Maavu, Pillaiyar idol with modak dough, Easy Ganesh Idol Making vinayagar idol at home using kozhukattai/modak dough is super easy and environment friendly also.
Ingredients
Rice flour - 1/2 cup
Boiling hot water - a little less of 1/2 cup
Oil - 1 tsp
Food Color -as needed(optional)

Procedure
First in a bowl, add the rice flour and oil, mix it well,then pour the boiling hot water and make a soft dough.
Divide the dough to two parts with one part having little extra dough and add few drops of colors(i have used yellow and blue here) into both dough,mix it well until it blends with the dough well.
Make a two balls from the yellow dough with one ball is slightly bigger than the others. Place the larger ball down and on top of it place the small ball, press it gently until it sticks together.Next make the small disc for ears.
Place it on the sides of the top ball. Then for the hands, make a small cylinder from the dough and in the end make a flat surface facing upwards.
Place it on below the ear on left side of pillaiyar, for the other side, make a small cylinder from the dough and in the end make a flat surface facing towards you and place it on below the ear on other side.
Next make small balls as kozhukattai and place it on left hand of pillayar. Then make a another small cylinder and place it on the center between two ears and gently bend it towards kozhukattai.
Next make two cylinders from the blue color and place it like legs on both sides, add a small piece of yellow dough on both ends of legs to make it looks like feet.
Then take a small blue dough and place it as trunk on both sides of the center hand. Finally make discs from both colors and place it on top of the pillar. Make sure the top looks like triangle. For the eyes place mustard on both sides.
I have some leftover dough, so make them as base for the idol and place the ganesh idol on top of it. 

Related: Ganesh Chathurthi Recipe CollectionsDecorate as you like with kukum and our Ganesh idol is ready.


Notes:
  • The dough should be smooth and pilable,but at the same time it should be non-sticky too.
  • Oil is must to give that shiny and non sticky texture to the dough
  • You can make this without any color also.
  • If you dough crack, grease your hand with oil and knead the dough well until smooth.
  • If the dough doesn't stick together, using little water on the sides.
  • Within a day or two the dough get dried and like clay idol, it gets some cracks and it starts to fell apart, after that i used to immerse them in the water and let it dissolve completely and discard.


Continue Reading »