Monday, December 19, 2016

Egg Pepper Masala | Egg Pepper Masala Dry

Egg Pepper Masala, my favorite dish to prepare when i'm lazy to cook anything elaborately or when i cook for me alone.This pepper masala goes well with rasam rice, chapathi or even with mild pulao.You can make this as completely dry or as semi gravy,Yep it's so versatile.
As temperature was below 30F here last weekend, i was so lazy and prepared this simple egg pepper masala along with some hot chapathi for our dinner. It tasted so wonderful for this weather. Give it a try, you wont be disappointed for sure.   

Egg Pepper Masala

Preparation Time : 10 mins | Cooking Time : 10 mins | Serves : 2 
Recipe Category: Curry/Dry Masala | Recipe Cuisine: Indian
Ingredients
Hard boiled egg - 3
Coriander seed - 1/2 tsp
Cumin seed - 1/4 tsp
Fennel seed - 1/4 tsp
Whole peppercorns - 1 tsp
Salt -to taste
Oil - 1 tsp
Onion -1/2(medium size)
Curry leaves - few
Coriander leaves for garnishing.

Procedure
Heat the pan and add coriander seed,cumin seed, fennel seed and whole peppercorns and dry roast till nice aroma comes from it, let it aside and cool it completely.Chop the onions into small pieces and keep it ready.Once it's completely cooled, put it in mixie jar and grind into fine powder.Slice the egg vertically and keep it aside.Heat the pan with oil,add onions and curry leaves and let it saute till the onions becomes translucent,then add the pepper powder and mix well.Add enough salt and 1/4 cup of water and bring to boil and cook it for 2 mins.Once the moisture almost evaporates, add the egg with yolk facing the pan bottom,with the spatula, take the masala from the sides and add it into the eggs and cook it for 1-11/2 mins.Then carefully flip the eggs and cook on other sides for 1 mins. Switch off the flame and add the chopped coriander leaves for garnishing.That's it.Quick and tasty Egg Pepper masala is ready.
Notes:
  • For the given quantity, the spicy level is medium,so you can add more or less peppercorns as per your preferred taste.
  • You can make this powder in bulk and store it in air tight container for more than one month at room temperature.
  • Dont over cook the egg on the pan, just 1-11/2 mins is fine,otherwise it becomes rubbery.


Continue Reading »

Friday, December 16, 2016

Samosa | Baked Aloo Samosa | Samosa with phyllo sheets | Party recipe

Samosa, a deep fried Indian snack made with savory potato filling.Traditionally samosa should be deep fried and also you have to prepare specific pastry sheets to fold the samosa.

But here in this recipe, I have taken a short route and  used a store bought phyllo sheets to fold the samosa and also instead of deep frying, I have opted for baking and it turned out super crispy and delicious.


Usually I buy phyllo sheets to make Baklava, a Turkish delight which we both are very fond of. After making baklava, i left with a few sheets and when i thought of what to make, i remembered seeing videos of baked samosa with samosa sheet, so instead of samosa sheet, i thought of using phyllo sheet as trial and it turned out way beyond my expectations.

Related: How to make Pistachio Baklava 

Since then it's one of  my favorite dishes to make on any get together.Last week, I tried this samosa for a potluck party and everyone liked it so much and even some of them asked me for the recipe and wondered how it stays so crispy even after a  few hours of making.

Yep, it stays crispy even for 3 hrs at room temperature and I think it's because of those phyllo sheets. If you're trying to impress your guests or your family in this holiday season, try this, definitely it's a showstopper on the table.

Baked Aloo Samosa

Preparation Time : 20 mins hr | Cooking Time : 40 mins | Makes : 12 
Recipe Category: Snacks | Recipe Cuisine: Indian
Samosa, Baked Samosa, Aloo Samosa, Potato Samosa Baked Aloo Samosa, a delicious savory pastry made from the phyllo sheets and spicy potato filling.
Ingredients
Potato - 2 
Dried Peas - 1/2 cup
Phyllo sheets - 6
Ajwain - 1/4 tsp
Red chili powder - 1/4 tsp
Turmeric powder - a pinch
Salt - to taste
Oil - 1 tsp + for brushing
Coriander leaves - few

Procedure
Soak the peas for 6 hrs. Cut the potatoes into half and put it in pressure cooker along with peas & enough water and cook it for 3 whistle.Once the pressure is released from the cooker, open it and let it cool.
Heat the pan with oil,add ajwain & fry it for 30 secs, then add the peeled and roughly chopped potatoes,spices(red chili & turmeric powder ) and salt. Mix it well.
Then add the peas and mix well with the potatoes and cook till the raw smell of the spices gone.Finally add the chopped coriander leaves and switch off the flame.Let it cool completely.
Take the phyllo sheet and thaw as per the instructions. Take a sheet and place it horizontally on the working board.
Cut the sheet into half and keep one half of sheet aside. Visualize the remaining sheet as three equal parts,fold the right side oven the center followed by left side over the center as shown below.
Brush the sheet with oil, then place a tbsp of potato mixture in the top of the sheets and fold as triangle.
Continue folding till the end of the sheet.
Again brush the top with oil and place it on baking tray.Do the same for the remaining sheets.
Bake it in the preheated oven at 350F for 20-25 mins.That's tasty and crispy samosa is ready.

Notes:
  • If you're using fresh peas, no need for soaking and pressure cooking.
  • For extract flavor, add 1/2 tsp of garam masala at the end.
  • If you don't like ajwain flavor, you can use cumin seed.
  • Keep an eye on samosa after 20 mins, remove from the oven when you see dark brown color at the edges.
  • Cover the phyllo sheets with damp kitchen towel until use, it has the tendency to easily became dry.
  • I brought phyllo sheets from walmart in the frozen section and I think it will be available in all major grocery stores. 
  • Instead of oil for brushing, you can use the ghee/butter for richness.
Continue Reading »

Wednesday, December 14, 2016

Easy Mutton Biryani | Mutton Biryani in pressure cooker

Mutton Biryani, the most famous rice recipe throughout the world nowadays. As christmas is nearing, the whole blogsphere is filled with wonderful baking recipes, but to me either it is christmas or ramzan, the first thing comes to mind is "Biryani". 

So here i'm sharing the easy way of making biryani using pressure cooker.Though we dont celebrate christmas, we have wonderful neighbor who celebrate christmas and they share their christmas biryani to us on every year and we do the same on Deepavali & Pongal. Yep,it's really good to have people from different culture around us.
On the day of christmas, our neighbor hired a person(Biryani Master) to cook biryani  as they are making in large quantities.This recipe is learned from that Biryani Master by my mom, whom later shared with me. They use wood fire to cook the biryani and also use the hot coal to put dum at the end.
 As in our home we can't too that, one day my mom prepared using the pressure cooker with the same ingredients & procedure and it turned out so flavorful and tasty,since then we followed the same procedure and every time it turns out so delicious and my brother who's a big fan of biryani prefer home made biryani than any restaurant ones since then.
For this recipe,you dont need any garam masala powder or biryani masala powder, the flavor comes from the ginger garlic paste, whole spices ,the seeraga samba rice , ghee and ofcourse from mutton.For this particular recipe, seeraga samba rice works better than basmati rice and also use good quality of ghee for great flavor.  
  

Mutton Biryani

Preparation Time : 1 hr(marination) | Cooking Time : 40 mins | Serves : 3 
Recipe Category: Biryani | Recipe Cuisine: Indian
Mutton Biryani, Pressure cooker Mutton Biryani, Lamb Biryani, Mutton Biryani with Seeraga Samba Rice Mutton Biryani, a delicious biryani recipe with wonderful flavor !.
Ingredients
Mutton - 400 gms
Jeeraga samba rice - 1 &1/2 cup
Onion -1 
Tomato - 1 
Green chili - 2
Mint & coriander leaves - a handful each
Lemon juice - 1 tsp
Cashew - 5
Bay leaf - 1
Cinnamon - 1/2 inch piece
Cloves - 5 
Cardamom - 2
Curry leave - few
Ghee - 2 tbsp 
Salt 
To marinate
Curd - 3 tbsp
Ginger garlic paste - 1 tbsp
Red chili powder - 1/2 tsp
Turmeric - 1/4 tsp
Lemon juice - 1 tbsp
Salt - to marinate

Procedure
First wash the mutton well and keep it ready,then add all the ingredients listed under "To marinate" into it.
Mix it well and cover it with lid and keep aside for minimum 1 hr.
Chop the onions into thin slices, tomato into small pieces and slit the green chili. Heat the pressure cooker with ghee,add the spices (cinnamon,cloves,cardamom & bay leaf) & saute for 30 secs.
Broken the cashews into small pieces and add it and saute till the cashew becomes golden brown,then add the onions,curry leaves & green chili and saute till the onions becomes translucent.
Now add the marinated mutton,saute well in the ghee for 2 mins, then add the tomatoes and give a good mix.
Add 1/2 cup of water and half of the coriander and mint leaves.Cover the cooker with lid and cook it for 3-4 whistles.
Once the pressure is released from the cooker, open the lid and check how much liquid you have in the mutton.
As i have 1 cup of mutton cooked water, so add 2 cups of water along with it in the pressure cooker and bring into boil.
Wash the rice and extract the water from it completely and keep it ready. Once the water comes to boil, add the salt(remember we already added salt in marination,so check and adjust as per your taste).
Add the rice, lemon juice & the remaining coriander & mint leaves.
Bring into boil and cover the cooker with lid. Cook  it for one whistle, in the mean time, heat the dosa pan on medium flame in another stove. After one whsite, remove the pressure cooker from direct flame and place it on dosa tava for 8-10 mins. Keep the flame in low medium for dosa tava.
Once the pressure is automatically released from the cooker, open lid(if you want more flavor add a tsp of ghee now) and gently stir.

Tasty Mutton Biryani is ready. We had it with mutton sukka and onion raita

Related : How to make  Mutton Kheema Curry/Kothu Kari Kuzhambu 

Notes:
  • Mutton pieces should be in about 1 inch size.Less than that disintegrated into the rice.
  • Wash the mutton with water for alteast thrice and then add a 1/2 tsp of turmeric powder rub it on mutton well and wash it with water finally.
  • Marinate for minimum 3 hrs or even you can refrigerate overnight for better result.
  • Use thick bottom dosa tava,it helps to avoid burning at the bottom.
  • I used raw jeeraga samba rice.
  • If you use boiled jeeraga samba rice, soak it for 15 mins before using.
  • You need 1:2 ratio of rice and water,so depends on how much water you have from the cooked mutton, you can increase or decrease the amount of water.
  • While pressure cooking the mutton, cook about 70% and the remaining will get cooked along with rice.So 3-4 whistle is enough for initial cooking.
Continue Reading »

Tuesday, December 13, 2016

Carrot Rice | Carrot Masala Rice | Lunch box Recipe

Carrot rice, an easy yet flavorful rice can be prepared under 20 mins if you have cooked rice in hand.I'm not a big fan of variety rice,i prefer my lunch as typical south indian meal like rice with sambar, poriyal,kootu and finish off with curd. So rarely i make them when we are at home, mostly i prepare & pack variety rice when we are going out for a day trip. 
I prepared this rice on one such occasion and it became our favorite rice since then.So nowadays i make them for our lunch along with some poriyal & curd rice. You can prepare this rice under 30 mins, even if you don't have cooked rice in hand. So it's prefect for lunch box packing in the morning. Now let's see the procedure.


Carrot Rice

Preparation Time : 5 mins | Cooking Time : 15 mins | Serves : 1 to 2 
Recipe Category: Rice | Recipe Cuisine: Indian
Ingredients
Carrot - 1 cup (grated)
Cooked Basmati Rice - 2 cup
Onion - 1 (small)
Green chili - 1
Curry leaves - few
Ginger garlic paste - 1 tsp
Oil - 1 tsp
Mustard - 1/4 tsp
Chana Dal - 1 tsp
Red chili powder - 1/4 tsp
Turmeric powder - a pinch
Garam Masala powder - 1/4 tsp
Salt - to taste

Procedure
First cook the rice along with salt and let it cool completely. Grate the carrot,chop the onions and green chili into small pieces. Heat the pan with oil.Add the mustard, let it pop,then add the chana dal & fry till chana dal becomes golden brown,then add the onions, curry & green chili,saute till the onion becomes translucent & add the ginger garlic paste and saute till the raw smell leaves.Add the carrot & other spices(chili, turmeric & garam masala powder) and salt(remember we already added the salt for rice,now add just for the masala). Saute the carrots & cook till the raw smell of the spices leaves and the carrot is well cooked.Switch off the flame.Add the rice & stir it gently till the rice is well mixed with the masala.That's tasty & flavorful carrot rice is ready.
Notes:
  • You can use left over rice too.
  • When you make variety rice,always add salt to rice while cooking itself,that will give balanced seasoning to the rice.
  • If you wish, add the chopped coriander leaves for garnishing.
  • Instead of oil, you can use ghee for great flavor.
  •  Ginger garlic paste and garam masala gives great flavor to this rice, so dont skip it.
  • Depends on carrot sweetness and your preference, you can adjust the red chili powder.
                                                          
It's time to dig in
Continue Reading »

Monday, December 12, 2016

Beetroot pachadi | Beetroot Raita | Accompaniment for Rice

Beetroot Pachadi/Raita, is one of the famous accompaniment prepared during onam festival in Kerala. For this year onam, we were invited by one of our friends to onam feast and it's my first onam feast and that's where i tasted this yummy pachadi.

I was awestruck by the color of pachadi, it was so pleasant to see the bright pink color of the  pachadi and it has perfect balance of sweetness from beetroot, spiciness from chilies & sourness from curd.

One more thing about this pachadi is that it doesn't have that earthy smell of beetroot, those who don't like beetroot because of that earthy smell, trust me and try this pachadi, you won't be disappointed.

Later i got the recipe from my friend by words of mouth & i forgot to make note of it. So when i thought of making this, all i remember was it's made by beetroot,coconut & curd. And i was bit hesitant to ask her again, so searched in google and the recipe from cookingandme looks promising and the texture & color looks somewhat similar to what i had tasted. So i tried and it was so delicious with rice and sambar. 

Beetroot Pachadi

Preparation Time : 10 mins | Cooking Time : 15 mins | Serves : 2 
Recipe Category: Accompaniment | Recipe Cuisine: Indian
Beetroot pachadi, Onam Recipe, Beetroot Raita Beetroot Pachadi/Raita, is one of the famous accompaniment prepared during onam festival in Kerala.
Ingredients
Beetroot - 1(small)
Curd - 1/3 cup
Oil - 1/4 tsp
Salt - to taste
To grind
Coconut - 1/4 cup(loosely packed)
Green chili - 1 
Cumin seed - 1/4 tsp
Garlic - 1 pod
Pearl onion - 3
To Temper
Coconut oil - 1 tsp
Mustard - 1/4 tsp
Curry leaves - few
Pearl onion - 2(chopped)

Procedure
Grate the beetroot using the small nozzle of grater. In a mixie jar, add all the ingredients listed under "To grind" and grind into smooth paste with water.
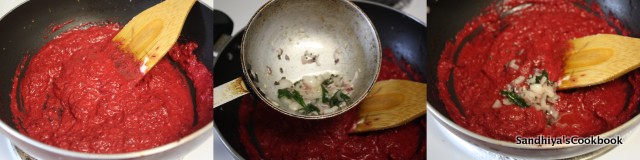
Heat the pan with oil, add the grated beetroot and saute till the raw smell leaves, then add the coconut paste and wash the mixie jar with 1/4 cup of water and add into the beetroot.
Add salt and bring to boil & cook till the raw smell leaves & switch off the flame. Let the beetroot comes to room temperature, add the curd & mix well.
In the meantime, temper the ingredients listed under  "To Temper" and add into the pachadi.
That's it !  Tasty Beetroot Pachadi is ready.

Related: How to make Beetroot Chutney

Notes:
  • Adjust green chili according to the sweetness of beetroot and to your taste.
  • Coconut oil gives great flavor to the pachadi, highly recommend to use it.
  • Depends on your required consistency, you can add more or less curd.
  • Add curd  after the beetroot comes to room temperature.
  • Using fine grater to grate beetroot gives nice texture to the pachadi and it also cooks easily.
Continue Reading »