Showing posts with label Biryani. Show all posts

Friday, April 16, 2021

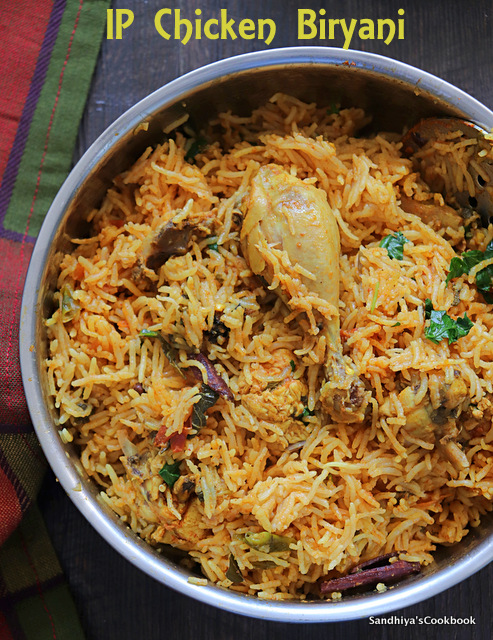
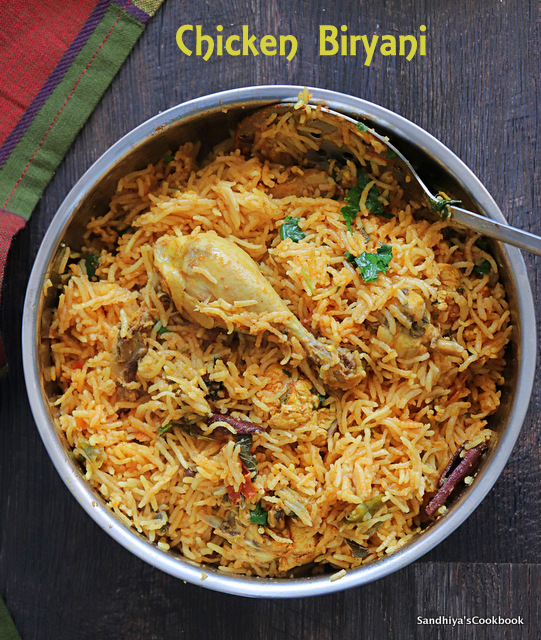
Instant Pot Chicken Biryani | Chicken Biryani

Instant Pot Chicken Biryani, making chicken biryani using Instant Pot is so effortless and the chicken biryani is so flavorful, delicious and fluffy ! 

Even since I bought(Nov 2020) the Instant pot, I have been using it mainly for making the biryani, soup and cooking lentils without soaking. Though i have been using it for many other cooking, these are my favorite to cook with Instant Pot. 

The one thing that I absolutely love about making the biryani in Instant pot is that nothing sticks or burns at the bottom of the pan. While making biryani in the traditional pressure cooker, i had the experience of burnt bottom, but so far in the last 6 months, i haven't burnt the biryani once in Instant pot :-) Hurray !! 
Instant Pot Chicken Biryani

Tips to make flavorful chicken biryani 

Compared to mutton, chicken itself doesn't have much flavor on its own, so in order to get the flavorful chicken biryani, the spices are really important. 
  • Make sure to use the whole spices in the tempering in addition to the garam masala powder.
  • I would highly recommend to use kalpasi if you can source it in your place. It surely brings out that restaurant style flavor. A little bit of kalpasi goes a long way here. So don't tempt to add more.
  • Use fresh mint and coriander leaves for great flavor.
  • Use chicken with bone for biryani, boneless chicken doesn't have much flavor, so is the biryani.

Related: How to make Restaurant Style Chicken 65

Instant Pot Chicken Biryani


Tips for making chicken biryani in Instant Pot

  • In Instant pot, we are going to pressure cook the rice for just 5 mins, so before adding the rice make sure that the chicken is at least half cooked so that the remaining get cooked while cooking the rice. 
  • You can cook the chicken in saute mode or just like me, you can pressure cook for just 2 minutes and do quick release.
  • Make sure to transfer the biryani to another pot once you opened the instant pot to avoid further cooking from the residual temperature of the pot and make it mushy.

Related: How to make Chicken Kebab


Instant Pot Chicken Biryani | IP Chicken Biryani

Preparation Time : 10 mins | Cooking Time : 10 minsServes :
Recipe Category: Biryani | Recipe Cuisine: Indian
Instant Pot Chicken Biryani, IP Chicken Biryani, 10 mins IP Chicken Biryani Instant Pot Chicken Biryani, making chicken biryani using Instant Pot is so effortless and the chicken biryani is so flavorful, delicious and fluffy.
Ingredients
Chicken - 1 lb
Basmati rice - 1 cup
Onion -1 
Tomato - 1 
Curd - 1/4 cup
Green chili - 1
Mint - 1 handful
Coriander leaves - a handful
Curry leaves - few
Ginger garlic paste - 1 tbsp
Lemon juice - 1 tsp
Ghee - 2 tsp
Oil - 1 tbsp
Water - 1 & 1/2 cups
Salt - to taste
Whole Spices 
Bay leaf - 1
Cinnamon - 1/2 inch piece
Cloves - 3 
Green Cardamom - 2
Black Cardamom -1(optional)
*Kalpasi - a small piece(optional)
Star anise - 1/2 
Nutmeg powder - 1/4 tsp
Spice Powder 
Red chili powder - 3/4 tsp
Turmeric - 1/4 tsp
Garam Masala powder - 1 tsp(optional)
* If you can't source kalpasi, skip it.


Instant Pot Chicken Biryani
Procedure
First soak the rice for 45 mins to 1 hr. Turn on the instant pot in saute mode, add the oil and add all the whole spices and grate some nutmeg(since i don't have nutmeg powder). 
Saute all the spices in the oil until they are aromatic(it's really important and gives great flavor to the biryani), then add onions, curry leaves and green chili with a bit of salt. 
Saute till the onions are transparent, then add the chicken, ginger garlic paste.
Next add the  tomatoes and mint leaves.  Saute till the ginger garlic paste is fragrant and then add all the spices.
Next, add the  curd & salt (just for chicken), mix it all well together and then add 1/2 cup of water &   give a quick mix. 
Close the Instant pot with lid and keep the whistle in sealing position. Cancel the saute mode and select the manual mode and set the timer for 2 mins. Once the time is up, cancel the warm mode. 
Wait for 2 mins and quickly release the pressure manually. Next add the remaining 1 cup of water and required salt for the biryani and then drain the soaked water from the rice and add the rice. 
Give a gentle mix. Add the salt for rice and finally squeeze the lemon juice  and Cover the Instant pot with lid and keep the whistle in sealing position.
Select the manual mode and set the timer for 5 mins. Once the time is up, cancel the warm mode and wait for 2 mins and quickly release the pressure manually. 
Sprinkle some coriander leaves  and drizzle the ghee on the top. Gently fluff it up and transfer to an another pot. 

Tasty Instant Pot Chicken Biryani is ready ! Serve it with Onion Raita

Related: How to make Boiled Eggs in Instant Pot 

Instant Pot Chicken Biryani
Notes
  • In this recipe, i haven't used garam masala. 
  • Adding ghee at the last enhance the flavor of biryani.
  • I have used India gate basmati rice
  • Soaking the rice for longer time is really important to get well cooked & fluffy biryani.
  • Once the time is up, wait for at least 2 mins before quick release the pressure. 
Instant Pot Chicken Biryani

Continue Reading »

Monday, May 25, 2020

Egg Dum Biryani | Muttai Biryani

Egg Dum Biryani is a flavorful & scrumptious biryani recipe made with exotic Indian herbs, rice and boiled eggs. I have an egg biryani recipe already here where rice is cooked separately and mixed with aromatic masala and eggs. 

But the recipe that i'm sharing is similar to how i had made vegetable dum biryani and fish biryani.  Like i said in all my dum biryani recipes, this egg biryani is also so flavorful and the rice grains are so perfectly cooked neither mushy nor under done

For a change, today i have used ponni rice for this biryani, but had tried with basmati rice many times before, it tastes awesome with both varieties of rice, so pick your favorite rice for this biryani. 

This biryani doesn't have any meat in it, therefore we have to add a  little more whole garam masala spices for recreating that exotic biryani flavors. So in addition to the whole garam masala in the tempering, i would recommend to add some garam masala powder also. 

If you have followed me for a  long time, you would have already known that if i had used whole garam masala in the tempering, usually mentioned the garam masala powder as optional for those who need more flavor. But for this recipe, adding both helps to elevate the flavor.  
Here, our days are getting longer and longer day by day, the sky is bright even after 9 pm and before 5 am as of now, it's kind of feel like living in daylight all time. Does anyone feel like this when spring season starts?? Like snow, leaves fall & sprouts again, this phenomenon of having daylight after 7 PM is always fascinating me, guess this kind of excitement never fades away since i was not used to this when growing up.  Ok.,now let's check out how to make this delicious egg biryani.


Egg Biryani | Muttai Biryani

Preparation Time : 40 mins | Cooking Time : 25 minsServes :
Recipe Category: Biryani | Recipe Cuisine: Indian
Egg Biryani, Muttai Biryani, Egg Dum Biryani, Biryani Recipe,Indian Biryani,One pot Rice Recipe Egg Dum Biryani is a flavorful & scrumptious biryani recipe made with exotic Indian herbs, rice and boiled eggs.
Ingredients
Ponni/Basmati Rice - 1/2 cup
Boiled Eggs - 3
Onion(medium) - 1
Tomato - 1/2( medium size)
Ginger garlic paste  - 1/2 tbsp
Lemon - 1 tsp
Mint & Coriander leaves - handful
Turmeric powder - pinch
Red chili powder - 1/2 tsp
Green Chili - 1
Garam masala - 1/2 tsp
Cloves - 2 
Cinnamon - small piece
Cardamom - 1 
Bay leaf - 1 
Kalpaasi - a small piece
Ghee  - 1/2 tbsp
Oil - 1 tbsp
Water - 1 cup
Curd - 2 tbsp
Salt- to taste
To marinate the eggs
Ginger Garlic Paste - 1 tsp
Turmeric powder - a pinch
Red chili powder - 1/4 tsp
Salt - to taste

Procedure
First soak the rice for 40 mins. Cut the boiled egg vertically into two and marinate it with the ingredients listed under "To marinate the eggs" and set it aside for 20 mins.
Cut the onion into thin slices, eggs into small pieces and slit the green chili. Heat a thick bottom pan( here i'm using my cast iron pan) with 1/2 tbsp of oil and add half of the onions with pinch of salt &  saute the onions in medium flame till it's dark brown. Remove from the pan and set it aside.
In the same add the eggs with yolk side down and cook them it it's golden brown and flip into other side and cook for 30 secs. Remove from the pan and let it aside.
Add the remaining 1/2 tbsp of oil into the same pan then add whole gram masala spices(cinnamon, cardamom, cloves, bayleaf & kalpaasi).Saute it in oil for 30 secs, then add the onions, curry leaves, green chili & ginger garlic paste. Cook till the onions are soft.
Next add the tomatoes ,finely chopped mint & half of coriander leaves ,curd & spice powder(turmeric, red chili & garam masala powder) give a good mix.
Cook till the tomatoes are mushy and then add the water.
Next add the salt and bring into boil & drain the water from the soaked rice and add into boiling water.
Finally squeeze the lemon juice, give a good mix, cover it with lid  & let the rice cook for 5-8 mins.
When the rice is almost cooked and the water is almost absorbed add the eggs on the top and ghee.
Cover it with lid and put on some weight on the top and keep the flame in low for 10 mins and switch off the flame and let it covered for 15 more mins. Then open the lid and add the sauted onions and coriander leaves.
Mix well and it's ready to serve. We had it with onion raita & cauliflower fry. For more rice and biryani recipe, check out here

Related: How to make fish dum biryani


Notes:
  • For today's recipe, i have used ponni rice, but tried it with basmati rice also for many times, both tastes good for this biryani, so use whatever you like.
  • Don't over cook the eggs otherwise it becomes rubbery.
  • Highly recommend to add kalpaasi for this biryani.
  • Make sure to use pot/pan has heavy bottom otherwise it's easily get burned at the bottom.
  • Adding ghee at last gives great flavor to the biryani.
  • To avoid the escape of steam, you can use any weight on top of the lid. If your lid is flat, even pot filled with water works fine for making dum effect.
  • Don't open the pot at once when the stove is switched off, keep it covered at least for 10 - 15 mins before opening the pot.


Continue Reading »

Saturday, April 11, 2020

Vegetable Dum Biryani | Vegetable Biryani

Veg Dum Biryani, a delicious one pot biryani made from basmati rice & vegetables and flavored with whole indian spices. Dum cooking means trapping the steam inside the vessel and cook it on low flame. Compared to another version of biryani, dum biryani is so flavorful and delicious. 

Traditionally in dum cooking, cooking pot is closed with lid, put on some weight on top to reduce the steam to escape and also put on some hot coal on the lid for even cooking. In home cooking, it's not always possible to add some hot coal on top of the lid, so usually i do skip that part, still the biryani turns out so good & flavorful every single time. 

The recipe that i'm sharing today is not Hyderabadi style dum biryani where the rice & vegetables are cooked separately and layered for dum cooking. Here we dump all the ingredients in single pot and do the dum cooking for aromatic & delicious biryani.

Though i like to cook my veg biryani in pressure cooker for easy process, some day if want exquisite delicious rice recipe then my go to method is dum cooking. I like the texture of the rice in dum cooking than any other way of cooking rice.

It's soft and at that same each grain is so separate("uthiri uthiriyaga" as we say in tamil ), it's very hard to achieve in pressure cooking at least for me. If you haven't tried dum cooking, do give this method a try.

No need for any special kitchen tools to achieve dum cooking, do check out the step by step instructions on how to put dum for biryani and also check notes sections for more options.Now let's check out how to make this delicious veg dum biryani.

Adding bread pieces to the biryani

In some Tamil Nadu marriage feast, a small amount of vegetable biryani is served before the traditional meal. In that biryani, a small piece of fried bread is added into it, it truly enhances the taste of the biryani. If you have a chance to eat that biryani, you know what I'm talking about. 

Some day, if i had left over bread slices, i do like to add it in my vegetable biryani. White bread tastes great compared to brown bread. Cut the bread into small pieces and then pan fry  with a tsp of ghee until golden brown and add into the biryani just before serving, mix well and serve. 
The bread pieces are deep fried in the marriage feast, but I prefer to pan fry them. 


Vegetable Dum Biryani

Preparation Time : 10 mins | Cooking Time : 20 minsServes : 2 to 3  
Recipe Category: Biryani | Recipe Cuisine: Indian
Veg Dum Biryani, Vegetable Biryani,Biryani in cast iron pan, Dum Biryani,One Pot rice Veg Dum Biryani, a delicious one pot biryani made from basmati rice & vegetables and flavored with whole indian spices.
Ingredients
Basmati Rice - 1 cup
Mixed vegetable(Carrot,Potato,Beans,cauliflower,Beetroot) - 2 cup
Onion(medium) - 1
Tomato - 1/2( medium size)
Ginger garlic paste  - 1 tbsp
Lemon - 1 tsp
Mint & Coriander leaves - handful
Turmeric powder - pinch
Red chili powder - 1 1/2 tsp
Garam masala - 1 tsp
Cloves - 2 nos
Cinnamon - small piece
Cardamom - 1 no
Bay leaf -1 
Star anise - 1 
Ghee  - 1 tbsp
Oil - 1 tbsp
Water - 2 cup
Curd - 2 tbsp
Salt- to taste

Procedure
Soak the rice for 30 mins. In the mean time, cut the vegetables(carrot, beetroot ,potato & tomato) into cubes, slice the onions into thin slices & remove the stem from cauliflower florets. Keep all the other ingredients ready. Heat a thick bottom pan( here i'm using my cast iron pan) with 1/2 tbsp of oil and add half of the onions.
Saute till the onions are brown in medium flame and remove it on the plate, in the same pan, add the remaining oil and the whole gram masala spices(cinnamon, cardamom, cloves, bayleaf & star anise).
Add the remaining onions & saute, once the onions become translucent, add all the other veggies & ginger garlic paste and saute until raw smell of ginger garlic paste goes off.
Add curd, chopped mint, coriander leaves, tomatoes and spice powder(turmeric, red chili & garam masala powder) give a good mix.
Let cover the kadai and let the veggies cook a bit. Once the veggies are half cooked and the veggie masala is bit thick,add the water.
Add salt and bring the water into boil, drain the water from the soaked rice and add into the boiling water.
Give a gentle mix without breaking the rice. Add the lemon juice & cover the kadai with lid and put on some weight to avoid the escape of steam. Keep the flame in low for 10 mins.
Then switch off the flame and let it covered for another 15 mins. Then open the lid and add the fried onions, coriander leaves and ghee on the top. Give a gentle mix and it's ready to serve. If you like to add bread pieces, add it now and let it sit for a couple of minutes before serving. 
Tasty and flavorful Dum Vegetable Biryani is ready. For other rice recipes, check out here
Notes:

  • Make sure to use pot/pan has heavy bottom otherwise it's easily get burned at the bottom.
  • Adding ghee at last gives great flavor to the biryani.
  • To avoid the escape of steam, you can use any weight on top of the lid. If your lid is flat, even pot filled with water works fine for making dum effect.
  • Don't open the pot at once when the stove is switched off, keep it covered at least for 10 - 15 mins before opening the pot.
  • Here i have used 2 cups of water for 1 cup of rice. Make sure that there is no water in the veggie masala, if you left with some water from cooking the veggies, adjust the water you add. 


Continue Reading »

Wednesday, March 11, 2020

Chettinad Chicken Biryani | Restaurant Chicken Biryani

Chettinad Chicken Biryani, a delicious & spicy chicken biryani with wonderful aroma. Chettinad cuisine is known for its flavor and unique spices in their cooking. 

Traditional chettinad recipes are mostly vegetarian and non vegetarian recipes are included in their cuisine very lately in the 18th century only. But now days, through the non veg dishes only, most people knew the chettinad cuisine, mainly because of the influence of chained chettinad restaurant like anjappar and so on. 
In our home, we are all fond of mutton biryani mainly because of its flavor and especially to me, Biryani means "Mutton Biryani" only, nothing beats the flavor of mutton biryani. Comes to mutton biryani, mutton gives great flavor to the rice and it doesn't need much flavor from other ingredients to make it so aromatic and delicious.

However, i felt that chicken biryani lacks that flavor until when i had tried this recipe. Seriously, i'm not exaggerating here, truly the flavor is amazing and all my chicken biryani recipe back off with this one :-) 


Coming to the recipe, a year back Amma told me about this chettinad chicken biryani recipe that tastes so similar to restaurant(anjappar) biryani which she had heard it from my periamma(her elder sister), seriously i do admire Amma and her sisters eagerness to try new recipes and voluntarily sharing the recipe with anyone if it turned out delicious.

After taking all the key notes from Amma, i tried the recipe in the next few days, it turned out ok and was not quite satisfied with the outcome. The main reason was that i had skipped a few key ingredients from the original recipe, one of them was "Mutton masala powder" from Sakti/aachi brand for the amazing flavor. 

Guess what ? Here in Canada, those brands are not available, so asked to take picture of ingredient list from the masala packet and watsapp it to me, Appa did promptly on the next day. After knowing all the ingredients that goes into masala, i was in the process of  creating my own recipe to replicate the flavor. 

In the first attempt, grounded all those spices and used it in the biryani, the flavor was way more intense than what i had expected, may be because of the freshness of the spices. It was quite over powering for me, so in the next time onwards, i have used them for tempering and it's perfect for my preference.  If you have mutton masala powder, use it a couple of tsp and reduce the whole gram masala in the tempering.


Once nailed the flavor of the biryani, the next struggle was how to cook that perfect texture of rice without being mushy or burned at the bottom.For this recipe, the mint and tomato are made into puree for better flavor, since it's puree, the chance of sticking to the bottom and get burnt is high. OMG, the struggle was REAL. 

It took me really a long time to figure that out, whatever Amma suggested didn't work for me because of the different stove top here and i wasn't cooking in the direct flame, so i had to figure out myself with trial and error. 

And finally after zillionth trial, it worked !!! Check out the notes section for all tips that i have learned in this process of making perfect chettinad biryani in pressure cooker. For the past three or four months, this biryani recipe is on repeat mode in my kitchen, honestly it's not a complaint !!! Do give it a try if you're looking for flavorful restaurant like chicken biryani. Now let's check out the recipe.


Chettinad Chicken Biryani

Preparation Time : 30 mins | Cooking Time : 20 minsServes :
Recipe Category: Biryani | Recipe Cuisine: Indian
Chettinad Chicken Biryani,Chicken Biryani,Restaurant Chicken Biryani,Basmati Rice, Chicken Recipe Chettinad Chicken Biryani, a delicious & spicy chicken biryani with wonderful aroma. Chettinad cuisine is known for its flavor and unique spices in their cooking.
Ingredients
Chicken - 1 lb
Basmati rice - 1 cup
Onion -1 
Tomato - 1 
Green chili - 1
Mint - 1 small bunch
Coriander leaves - a handful
Bay leaf - 1
Cinnamon - 1/2 inch piece
Cloves - 3 
Cardamom - 2
Kalpaasi - a small piece
Star anise - 1/2 
Curry leaves - few
Ghee - 1 tbsp
Oil - 1 tbsp
Water - 1 & 1/2 cups
(see notes for more clarification)
Salt - to taste
To marinate
Curd - 2 to 3 tbsp
Ginger garlic paste - 1 tbsp
Red chili powder - 3/4 tsp
Turmeric - 1/4 tsp
Lemon juice - 1 tsp
Salt - enough for chicken


Procedure
First wash the chicken with water thrice and add 1/2 tsp of turmeric powder and rub it well and wash once and keep it ready,then add all the ingredients listed under "To marinate" one by one.
Mix it well and cover it with lid and keep aside for minimum 1 hrs.
Soak the basmati rice in water for 30 mins. Cut the onion into thin slices, tomato into small cubes, clean the mint and coriander leaves. Add the tomatoes and mint leaves into mixie jar and grind into smooth puree.
In a pressure cooker, heat the oil, add cinnamon, cloves, cardamom, star anise and kalpaasi and saute it for 30 secs, then add the onions, curry leaves and green chili. Saute til the onions are translucent.
Add the marinated chicken and saute it in the oil for 2 mins, then add the tomato & mint puree into the chicken, give a good mix.
Wash the mixie jar with 1/2 cup of water and add into the chicken and pressure cook for one whistle. 
Let the pressure release from the cooker automatically and then open it, measure the cooked water in the pressure and add the more needed water(see notes for water) & salt(we already added salt in the marination, so here add only for rice). Drain the water from the soaked rice.
Let the water comes to boil and then add the soaked rice, give a gentle mix without breaking the rice.
Bring into vigorous boil and cover the pressure cooker with lid and cook it for 1 whistle and keep it in lowest possible heat for 5 mins and switch off the flame. Let the pressure release from the cooker automatically and then open it.
Transfer the biryani into another pot (to avoid further cooking of the rice ), add the finely chopped coriander leaves and ghee. Mix it gently. 
Tasty and flavorful chicken biryani is ready. Serve it with raitha and chicken curry. We had it with chicken kulambu, Onion raitha & tandoori chicken.


Notes:
  • Measure the chicken cooked water and then add the needed water. For ex: if the cooked chicken water is 1 cup, then add only 1/2 cup of extra water for 1 cup of rice. Rice and water ratio is 1:1 &1/2
  • Chicken leaves water while pressure cooking and also the curd in the marination increase the liquid content. So there may be chance of more than 1/2 cup of liquid in the cooked chicken than the added 1/2 cup of water.  So make sure to measure the liquid before adding the water.
  • Make sure to soak the rice for minimum 30 mins. 
  • Make sure to keep the biryani in the lowest possible heat after one whistle to avoid burning at the bottom.
  • Still if you're worried about burning at the bottom, place the cooker on the tava  instead on stove directly after one whistle.
  • Once the rice is added into pressure cooker, make sure to bring into vigorous boil and close the lid and put on weight. The first whistle will happen around 3 to 4 mins. Even if not whistle after 5 mins, keep the flame in lowest possible. Further keeping the flame in high leads to burning at the bottom. 
  • After adding the rice, stir the whole mixture till the bottom and make sure that nothing sticks to the bottom.
  • Kalpasi,ghee & mint tomato paste are the major flavor, so don't skip it or reduce the quantity. 
  • You can make this biryani with seeraga samba rice also.
  • For even more flavor, you can grind 1/2 of whole garam masala spice with mint and add the remaining in the tempering.
  •  If you have mutton masala powder in hand, use it a couple of tsp and reduce the whole gram masala in the tempering.


Continue Reading »