Showing posts with label Basics. Show all posts

Thursday, April 8, 2021

How to Peel Tapioca Roots | Cassava | Maravalli kizhangu

Tapioca roots also known as kappa, maravalli kizhangu or kuchi kizhangu in South parts of India.  Though tapioca roots are native to South America, it's a staple food in kerala state of India and it's one of their common breakfast foods 

In our home, we used to have the steamed tapioca as a snack for the evenings or as elevenses food. It's one of our family favorite snacks of all time. You might already know this if you have followed me on IG. 

Tapioca Roots

Related : How to make Tapioca Adai


Whenever I share the steamed tapioca pictures on IG, I get a couple of requests for how to peel the tapioca because the skin is so hard.  Yeah, I know compared to Indian tapioca, the tapioca available here in North America is a bit bigger and the outer skin is also thicker.  

Immediately I shot a quick video for IG reels and shared it. But I thought a separate post would be more helpful so here i'm with this post on how to peel and cut the tapioca. Hope this post is useful and informative.  


How to Peel Tapioca Roots

Preparation Time : 5 mins | Cooking Time : 0 minsServes :
Recipe Category: Kitchen Basics | Recipe Cuisine: Indian
How to peel Tapioca Roots, Kappa, Maravalli Kizhangu,Cassava Let's see how to peel Tapioca Roots easily.
Ingredients
Tapioca roots - 1

Tapioca Roots
Procedure
First take a tapioca root, cut into half with a sharp knife.
Next make a sharp slip on the skin of the tapioca roots and gently lift the skin using the knife. 
Then switch to the dinner knife and run it along the skin. It will help to remove the skin from the tapioca roots.
Once the skin is peeled, cut the tapioca vertically into two slices and remove the thick string at the center.
Now cut the tapioca roots into desired shape and it's ready to use.
Tapioca Roots
Notes
  • If the skin sticks to the root well and stubborn to peel off through sliding the knife method, then simply trim the skin using a sharp knife :-)

Continue Reading »

Friday, June 12, 2020

Homemade Coconut Milk from Fresh Coconut

Homemade Coconut Milk, making coconut milk from the fresh coconut at home is easier than you thought and it's so flavorful and absolutely delicious. If you've been following me for a while, you might know by now how much i like coconut or anything with coconut. 

As i grew up in South Tamilnadu, coconut plays a major role in our cooking. There were times that i couldn't imagine making a meal without coconut. For all three meal, we used to include coconut in one or other form when we are in home town.

So, making coconut milk at home is very common sight in our household.Coconut milk is used as accompaniment for  breakfast such as idiyappam and appam  or in curries like sothi kulambu or in dessert varieties like payasam or snacks like  paal kozhukattai and so on. In recent times, coconut milk is so popular and have seen recipes using coconut milk as a vegan substitute for many milk based recipes.  
What is Coconut Milk and how to choose coconut for coconut milk?
Coconut milk is a milky white liquid extracted from the matured coconut. Since matured coconut has a lot of milk in it, it's advisable to choose coconut with dark colored coconut shells to make coconut milk.

How much Coconut Milk is extracted from a coconut ?  
It's really hard to say because every coconut slightly yields differ amount of coconut milk depending on how mature it is.

is it necessary to use warm water to extract coconut milk?
Not always. Back in India, we never used warm water to extract coconut milk, ordinary tap water works fine. But here in US/Canada, i have found the fat from the coconut easily separated while grinding because of the cold weather, so using warm water helps to avoid the fat getting separated.
What's  1st & 2nd Coconut Milk ?
These terms are mostly used in Indian Cooking. The freshly squeezed coconut milk from the coconut flesh is known as "1st coconut milk". After the first squeeze of coconut milk, the left out coconut debris is grounded again with some water and squeezed again and that's known as "2nd coconut milk". 

In Indian Cooking, 2nd coconut milk is often cooked along with veggies and it's ok to boil 2nd coconut milk and it doesn't curdle because of its low fat content . First coconut milk is mostly added in the end of stew, payasam for richness and mostly it's advisable not to boil the first coconut milk vigorously 

If you're planning to serve coconut milk as it is along with idiyappam and appam, then mix both 1st and 2nd coconut milk together and use.

How long can i store the coconut milk ?

Honestly, we never store the coconut milk at our homes. Always make them fresh for all the dishes and personally i like the freshly squeezed coconut milk more than any canned coconut milk. Once you have tasted the fresh coconut milk, you never go back to those canned coconut milk.  

But you can store any leftover  up to 3-4 days in the refrigerator and for more days, store it  in the freezer. Right before using it, bring the coconut milk to room temperature because the fat tends to settle on top and leaves the water at the bottom. Keep it in warm water for a few minutes, mix it well and use.

Hopefully i have answered all the basic FAQs about  coconut milk, now let's check out how to make coconut milk at home.


Homemade Coconut Milk from Fresh Coconut

Preparation Time : 15 mins | Cooking Time : 0 minsServes :
Recipe Category: Coconut Milk | Recipe Cuisine: Indian
keywords description.
Ingredients
Coconut - 1
Warm Water - as needed

Procedure
Break the coconut into two, take the coconut flesh from the shell using sharp knife and cut into small pieces.
To strain the coconut milk, line the strainer with thin cotton cloth/cheese cloth and keep it ready. Add the coconut pieces into the mixie/blender jar and grind into coarse mixture.
Then add about 1/2 cup of warm water and grind into smooth paste.
Transfer the coconut paste into the cotton cloth and squeeze out all the milk from it. That's it, it's our first coconut milk.
To make second coconut milk, add the left out coconut mixture from the cloth into mixie/blender jar along with some warm water and grind it into smooth paste.
Squeeze out the milk from it again. That's our second coconut milk. It's little bit watery compared to first coconut milk. Still it's so flavorful. 
Fresh Homemade coconut milk is ready. 
For more kitchen basic recipes , do check out here.
Notes:
  • Depends on how mature the coconut is and the amount of water we used in making coconut paste, the coconut milk quantity varies.
  • No need to peel the brown skin of the coconut for making coconut milk.

Continue Reading »

Friday, June 5, 2020

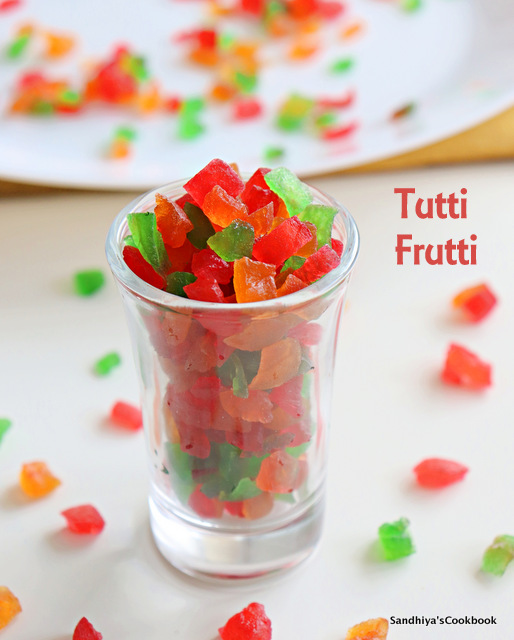
Indian Tutti Frutti from Watermelon Rind

Tutti Frutti, a colorful confectionery made from various candied fruits. Last year when i had  bought the "candied fruits & peel mix" from local store here in Canada, thought it was similar to tutti frutti available in India. But after the taste test only, realized that they were complete different. It has mix of candied fruits with various flavor, guess some are natural and some are artificially colored. Then started my search to understand how Indian tutti frutti is made !!!

In India, Tutti Frutti means artificially colored candied raw papaya  which is completely different from Western world Tutti Frutti. Throughout India it's widely used in bakery items like cookies, buns, cakes & so on.  My eagerness to make tutti frutti at home dropped when i knew that it's made from raw papaya. Because it's hard to source them here and also it takes years for me to finish off all the tutti frutti made from one whole raw papaya. Never used raw papaya in my cooking therefore don't know what else to make 

Recently through one of FB recipe sharing group, came to know this awesome recipe of making tutti frutti from watermelon rind. Stop !!! What is watermelon rind?? It's nothing but the white part in between the peel and pink flesh part. That's totally edible and also understood recently that it can also be used in making dosa, chutney, curries apart from this tutti frutti. Never tried any of those recipe, if tried, let you guys know. 

Ok, coming to the recipe, it's such a simple & easy recipe. Don't throw away the left over part of watermelon after eating the pink flesh. That's all you need to make this awesome tutti frutti. Totally amazed by the output when i had tried first time!! Hardly noticed any difference in taste & texture !! Now let's check out how to make tutti frutti from watermelon rind.

Tutti Frutti from Watermelon Rind

Preparation Time : 1 hr | Cooking Time : 15 minsServes : 1/3 cup 
Recipe Category: Basic | Recipe Cuisine: Indian
Tutti Frutti,Watermelon Rind, Indian Tutti Frutti,How to make, Homemade Tutti Frutti Making Indian Tutti Frutti from watermelon rind is so easy !! The taste and texture is so similar to the original which are made from raw papaya.
Ingredients
Watermelon rind - 1 & 1/2 cup(chopped)
Sugar - 1/2 cup
Water - 1 & 1/2 cup
Food colors - few drops

Procedure
Take the watermelon rind and peel the skin and try to remove all the pink flesh part(if there is any left)
Cut them into stripes and later into small cubes. 
In a sauce pan, add the sugar and water & put it on the flame.
Once the sugar is all melted, add the watermelon rind . Let it comes to boil and keep the flame in low and simmer for 10 - 12 mins.
Remove from the flame and let it cool a bit. The watermelon rinds look transparent when it's cooked. Divide the cooked watermelon rind into three equal bowl.
Add few drops of food colors(i have used yellow, red and green) in each bowl & mix it well.Let it sit aside for 1 hr.
Then drain the excess sugar syrup and spread it on plate and let it dry completely. When it dries, it shrink its size.  
Tutti Frutti is ready. Store it in air tight container for future use. It can be used in all types of sweet bakery items . Check out  this coconut bun/thengai bun recipe on how i have incorporated tuttti frutti in it
Notes:
  • Cook the watermelon rind until it's transparent and still retains its shape. Don't over cook them otherwise it would be mushy.
  • Use any color as you like.
  • For orange color, i have used mix of red & yellow color.
  • Make sure to let it dry completely and then store it.
  • Initially when the tutti frutti is wet, i have used  parchment paper to avoid the color getting transferred to the vessel, once it's non sticky, transfer into clean plate for further drying.
  • Color get intensify when it's dried completely.


Continue Reading »

Friday, April 17, 2020

Homemade Easy Pizza Dough | Pizza Dough Recipe

Homemade Pizza Dough, an easy to make dough with basic ingredients like flour, yeast, oil & salt. If you have been following on IG, you would have already knew now how often i make pizza at home with homemade sauce & dough.

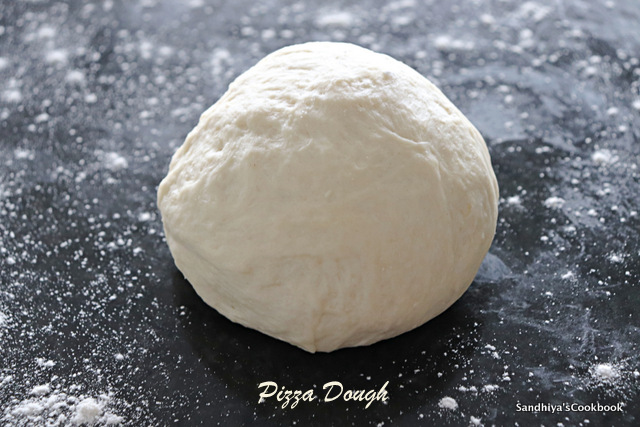
For all this year of baking that i have learned making perfect dough is the crucial step for delicious pizza, like any yeasted dough, here also yeast does all the magic work, all we have to do is measure the ingredients properly, make soft and pliable dough, last but most important make sure that the yeast is active. Pizza Dough

How do check that the yeast is active ??

  • If you're using instant yeast, make sure that you're using it within the expire day.
  • For dry yeast, mix yeast and sugar in a bowl, add warm water(the water should be warm enough to touch comfortably, neither too hot nor too cold), mix it well and set aside for 10 mins. It should be all bubbles and has strong yeast flavor.

Related : How to make Classic Pizza Sauce from fresh tomatoes 

Before punching out the gas from the fermented dough, i would like to see how the gluten web is formed inside, so gently peel off the top layer of the dough!!! Look at that fascinating web gluten 👇
Fermented Pizza Dough

How to proof the dough perfectly??

  • Make sure to add some sugar in the yeasted dough because yeast needs some sugar to activate.
  • For all type of yeasted dough, first mix yeast with sugar and then add salt.
  • Make sure keep the dough in warm place like the place you used to ferment your curd or dosa batter. If you're living in cold place, place it in the oven with lights on.
  • Practice, practice, you will get a hang of handling yeast in a while.  
Ok, now let's check out on how to make perfect pizza dough without much kneading and machine. 
Pizza Dough

Homemade Pizza Dough | Pizza Dough Recipe

Preparation Time : 2 hr | Cooking Time : 0 minsServes : 1 medium pizza 
Recipe Category: Dough | Recipe Cuisine: Italian
Pizza Dough, Home made, How to make pizza dough, pizza dough without any machine,hand made pizza dough,easiest pizza dough Homemade Pizza Dough, an easy to make dough with basic ingredients like flour, yeast, oil & salt.
Ingredients
All purpose flour - 1 cup
Instant yeast - 1/2 tsp
Sugar - 1 tsp
Salt - 1/4 tsp
Olive oil - 1 tsp
Warm water - as needed

Pizza Dough
Procedure
Measure and take the flour in a bowl, add yeast and sugar.
Mix it well together and then add the salt and olive oil.
Mix it with your hands until the oil is well incorporated into the flour. Next add water and make a soft pliable dough.
Apply some oil on the dough and bowl. Let it covered and sit it aside for 2 hrs and until it's doubled in size.
Punch out the gas in the dough and your pizza dough is ready to bake !!! 
Notes:
  • Before adding salt to the flour, make sure that the yeast and sugar mix well with the flour, it helps to activate the yeast.
  • If you're using dry yeast, add the yeast along with sugar in some water and let it proofed and then use it the flour.


  Sign of well fermented dough !!
Pizza Dough
Continue Reading »

Friday, November 22, 2019

How to make curd at home in cold place | Home made Yogurt

Home made Curd is very easy to make and tastes so creamy and delicious. Back in India, in our home, Amma makes curd every day as fresh. In the night, after finishing all the chores of the day, she adds a little bit of leftover curd to the lukewarm milk and the next day, the curd sets so beautifully without much effort because of the warm temperature. 

When in summer, she used to make the curd in the morning only, within 4 hours, it sets beautifully and ready for our midday meal. So if you're in a warm place, making curd at home is such an easy task. 

But if you live in a cold place like me, I'm not gonna say that it's hard to make curd at home, but you need to take care of certain things to set the curd properly, otherwise it will turn slimy with some weird smell.

I don't have that much energy like amma to make curd everyday, so usually i make curd once a week. Once it sets, I will keep it in the refrigerator and use it as needed.   
Though I have shared my daily meal platter in Instagram, it's been a while since I have posted anything here, so today morning itself, I was so determined to sit, write and post a recipe. I have a handful of recipes with pictures in draft for a while, and will post one by one soon. 

For the past three weeks, the temperature here has dropped drastically, hardly it goes above 0C, fall back daylight time change, earlier sunset around 4.30, all makes me lethargic. 

After the colorful autumn foliage, the whole city now turned into white and grey because of one heavy snow storm. It seems like the colorful screen in front of you changes into black and white screen all of sudden. Really fascinating !!!

Ok, now back to today's recipe, here i have shared my tips to set the curd properly, this post will be useful for beginners or those who try to make curd for the first time at home and the experts, please excuse !!!

How to make curd at home in cold place

Preparation Time : 6 hrs | Cooking Time : 15 minsMakes : 2 cups 
Recipe Category: Curd | Recipe Cuisine: Indian
Homemade Curd, Yogurt, Basic, How to make Curd Home made Curd is very easy to make and taste so creamy and delicious.
Ingredients
Milk - 2 cups
Curd - 2 tsp

Procedure
Pour the milk into sauce pan, let it bring into boil.
Once the milk started to boil, switch off the flame and let it cool a bit.  Take the curd in bowl and whisk it well without any lumps and keep it ready. 
Pour the curd into bowl which you're gonna set the curd, check the milk temperature by placing your finger in the milk. It should be bearable but still it's warm, that's correct temperature. Pour the milk into the curd culture. 
Mix it all well together and partly cover the bowl with lid and place it in the warm place. I kept it in oven with lights on. 
After 6-8 hrs, the curd would be set beautifully, immediately keep it in the refrigerator to avoid further souring of curd.Tasty home made curd is ready. 

Related : How to make Indian Cottage Cheese / Malai Paneer


Notes:
  • Make sure that the curd culture is at room temperature before using it.
  • Don't cover the bowl with lid completely when the milk is warm to avoid the milk sweating.
  • Make sure to mix the curd culture with the milk well.
  • Keep the milk in warm temperature to set the curd.
  • Use good quality of curd culture, if the curd culture is slimy, then the end product will also be the same.
  • You can use the store bought curd as curd culture.


Continue Reading »

Tuesday, October 8, 2019

Home made Pumpkin Puree | How to make Pumpkin puree at home

Home made Pumpkin Puree, easy to make puree from the scratch and it's far better than store bought pumpkin puree. As fall season is in peak here now, all stores are stocked up with varieties of pumpkin in different size and also all the bakeries  and cafe in the town has introduced pumpkin flavor in their menu, all this tempted me to try something with pumpkin. 
As i went though the pumpkin recipe online, every one calls for pumpkin puree, instead of buying the canned one, i thought of making at home. Pumpkin Puree can be made from baking, boiling or steaming of pumpkin easily. Here in today's recipe, i have used steaming method to make the pumpkin puree. It turned out so good and had used them in pumpkin bread, it tastes so delicious. Stay tuned for pumpkin bread recipe, will update here in a day or two. Now let's check out how to make this pumpkin puree. 

Home made Pumpkin Puree

Preparation Time : 10 mins | Cooking Time : 25 minsMakes : 2 cups 
Recipe Category: Puree | Recipe Cuisine: Global
Pumpkin Puree, Puree,Steamed,How to,Basics Home made Pumpkin Puree, easy to make puree from the scratch and it's far better than store bought pumpkin puree. Pumpkin Puree can be made from baking, boiling or steaming of pumpkin. Here in today's recipe, i have used steam method to make the pumpkin puree.
Ingredients
Pumpkin - 2 lb 

Procedure
Cut the pumpkin into thin slices, then remove the skin and the seeds and cut into small cubes.Heat the water in the steamer pot. Add the pumpkin in the steamer basket and place it on the pot.Cover the pot with lid and steam it for 20-30 mins until the pumpkins are tender.Switch off the flame and let the pumpkin to cool. Put the pumpkin into blender and grind into smooth puree.
Tada, Home made Pumpkin puree is ready.
Notes:
  • Make sure the boiling water doesn't touch the pumpkin basket.
  • Cooking time varies from pumpkin varieties and how small you cut the pumpkin.
Continue Reading »