Showing posts with label gram flour. Show all posts

Wednesday, October 23, 2019

Garlic Kara Sev | Sattur Kara Sev | Kara Sev Recipe

Garlic Kara Sev, a delicious savory snack made from gram flour and flavored with garlic. Long time ago, I had seen this Sattur kara sev recipe on a TV cooking show and immediately  made a note on this recipe in my drafts. 

Sattur is a small town in South tamilnadu and it's famous for its sev, kadalai mittai & inji marapa, often seen that the vendors selling them in the train when we cross sattur. But never bought any from those vendors so far. 

Though I make kara sev often at home as our snack for tea time, never tried to flavor it with garlic. Few weeks back, I tried this garlic sev  as a snack for evening tea.

It was so good and flavorful. Making this sev is  so similar to regular sev. Adding garlic truly elevates the taste and flavor in abundance. Feel like the flavor intensifies with the time, the flavor was so intense on the next day than the day that it was made.

Tips to get crunchy garlic kara sev

  • Make sure to cook on medium flame so that it became crunchy without getting dark in color 
  • Don't reduce the amount of amount in the recipe
  • Finally store it in airtight container for keeping it crunchy for weeks

Related : How to make Butter murkku


Garlic Kara Sev | Sattur Kara Sev

Preparation Time : 10 mins | Cooking Time : 20 minsServes : 2 cups 
Recipe Category: Snacks | Recipe Cuisine: Indian
Deepavali, diwali recipes, Evening Snacks, Garlic, gram flour, Kara Sev, Rice Flour, Sattur, Snacks, TamilNadu Special, Garlic Kara Sev, a delicious savory snack made from gram flour and flavored with garlic.
Ingredients
Chickpea flour/ Besan - 1 & 1/2 cup
Rice flour - 1 cup
Cumin seed - 1 &1/2 tsp
Butter - 1 tbsp
Garlic - 5 pods
Red Chili Powder - 1/2 tsp
Asafoetida Powder - 1/4 tsp
Salt - to taste
Oil for frying

Procedure
First peel the garlic, put it in a mixie jar and grind into paste, then add 2 tbsp of water and pulse it once and keep aside until use.
In a large bowl, add the besan, rice flour, asafoetida powder and salt.
Next add the red chili powder and cumin seed and mix it all together well.
Then add the garlic puree, melted butter and mix it well together. Add water slowly and make a soft dough.
Use the three hole disc in the murukku press and fill it with the karasev dough and close it.
Heat the oil for frying, check the oil temperature by dropping a small piece of dough, it should come up immediately. that's the correct temperature for frying karasev. Squeeze the dough into the oil.
Squeeze the dough as concentric circles in the pan and let it fry for few mins. Gently flip it over the other sides and cook till it became golden brown and also the "shh" sound stops.
Drain from the oil and place it on tissue paper. Once it comes to room temperature, breaks into 1 or 2 inch pieces as you like.
Tada, tasty and flavorful Sattur Karasev is ready.

Related : How to make Kadala mittai

Notes:
  • Don't over crowd the pan, squeeze the dough till the pan holds.
  • In the same recipe, you can reduce the chili powder and add crushed pepper corns too.
  • It's super crunchy and delicious with wonderful garlic flavor.
  • The dough should be soft and pilable. 


Continue Reading »

Friday, February 24, 2017

Milk Mysore Pak | Gram flour & Milk powder Fudge | Besan Fudge

Milk Mysore pak or we can say Gram flour fudge with milk powder.Two years back, when i saw the sweet in the name of "Milk Mysore pak" at a local sweet stall,i was curious and  immediately bought it just for the name mysorepak(yep,i'm a big fan of mysore pak ),but it taste nothing like mysorepak,it was like caramelized palkhova,quite unique and i liked it so much.Later when i searched online in the name of Milk Mysore, all the recipe i read was made with all purpose flour,but i'm quite sure that the sweet stall ones were made with gram flour. So i took the measurements as guidance and used gram flour in the place of all purpose flour and prepared this sweet on last diwali and it turned out super tasty and i shared few pieces with my friends, they too liked it and asked me for the recipe.
The texture of this mysore pak is hard(like the hard mysore pak with porous texture) and also it's more darker in color than the regular mysore pak because of caramelized milk powder and you can see from the pictures that the middle of the mysore pak have darker color as it takes more times to cool than the sides.

Milk Mysore pak

Preparation Time : 5 mins | Cooking Time : 25 minsMakes : 12 pieces 
Recipe Category: Sweets | Recipe Cuisine: Indian
Ingredients
Milk Powder - 1/2 cup
Besan/Gram Flour - 1/4 cup
Sugar - 1 cup
Ghee - 1/2 cup
Water

Procedure
First grease the pan that you're going to pour the mixture with ghee and keep aside. Measure & take the ingredients. Heat the nonstick pan, add sugar & water(just enough to immerse the sugar) and bring into boil.Let it boil until it reaches single string consistency(if you take sugar syrup in between your thumb and fore finger,it should form single string)Then keep the flame in low & then add the milk powder and gram flour. Mix it well vigorously to avoid lumps.Again increase the flame to medium and then start adding ghee(a tbsp at a time).Once the ghee is all absorbed, add the next tbsp of ghee.Once all the ghee is added, the mixture becomes frothy and also by the time, it turns into brown color because of milk powder caramelization. Switch off the flame.Pour the mixture into the greased pan,let it aside for 3-4 mins,then make the mark on the mysore pak with knife. Once it's completely cooled, invert the pan and remove the pieces.Tasty Milk Mysorepak is ready.As it cools down, the center becomes more darker in color than the sides.
Notes:
  • Keep stirring continuously once you added the milk powder and besan.
  • When the milk powder starts to caramelize,you can see the streaks of brown color at the bottom of the pan.Don't worry,stir it continuously within few minutes,whole mixture becomes brown color and it's time to switch off the flame.
  • Once you switch off the flame, immediately pour the mixture into the greased pan.Otherwise the mixture gets cooked further from the heat of the pan and turns so hard.

BMLogo
 Check out the Blogging Marathon page for the other Blogging Marathoners doing this BM#73
Continue Reading »

Friday, October 21, 2016

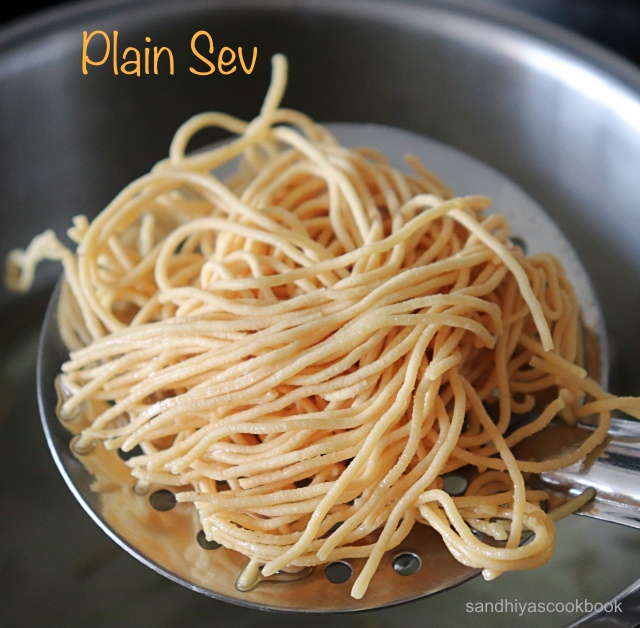
OmaPodi | Plain Sev | Diwali Recipes

Omapodi , an easy to make delicious snack with chickpea flour.  As we love omapodi a lot, i make them frequently for our evening tea.It's so simple and doesn't need any fancy ingredient and you can make about 1 cup of omapodi under 20 mins from the scratch.

Here in the recipe i used only 1 tsp of omam/ajwain for 1 cup of chickpea flout, since i prefer my omapodi with mild flavour, but you add additional 1/2 tsp of omam/ajwain for more flavour. 

I would highly recommend to make freshly grounded omam/ajwain for this recipe. Pre-made omam/ajwain powder doesn't have that strong flavour. 

Also the quantity of omam/ajwain, is very little it's difficult to powder them in mixier, so i put in between kitchen paper towel and crushed it with rolling pin. It can also be powdered in hand motor & pestle. 

Lastly, if you're a beginner in cooking or just afraid to squeeze the dough directly in hot oil, i would recommend to squeeze the dough in back of the laddle or small plate and then just invert it into the hot oil. 
 
Ok, now let see the procedure for making omapodi/ plain sev.


Omapodi | Plain Sev

Preparation Time : 10 mins | Cooking Time : 20 minsServes : 2  
Recipe Category: Snacks | Recipe Cuisine: Indian
Ingredients
Gram Flour - 1 cup
Rice Flour - 1/4 cup
Butter - 1 tbsp
Ajwain/Omam - 1 tsp
Hot water - 1/4 cup
Salt - to taste

Procedure
Dry roast omam till nice aroma comes from it, powder it and put in a bowl and pour 1/4 cup of hot water into it and let it aside until it comes to room temperature.
In a large bowl, add gram flour, rice flour and salt. Mix it well.
Add butter and mix it well with the flour, then filter the omam water and add into the flour.
Mix it with your hand and form a stiff dough.Take the murukku press with omapodi disc, make a log from the dough and put in the murukku press and close it with lid.
Heat the oil for deep frying and squeeze it directly on the heated oil in a circular motion starting from the end and finish in the middle. Cook on one side and then flip it and cook still "shhh" sound stops.Remove it from oil and place it on tissue paper.Do the same for the remaining dough.
Tasty & crispy Omapodi is ready. Let it cool completely and store it in air tight container.

Related : How to make Thukkada/Spicy Diamond Cuts

Notes:
  • While squeezing omapodi on heated oil, be quick and also keep distance between your hands and heated oil.There is a chance of heavy steam when the dough touches the hot oil. 
  • If you want more flavor, along with omam water,add the crushed omam too.But if the hole in the omapodi disc is small, there is a chance of omam get stuck in those holes and make it difficult to squeeze.
  •  Adding butter & rice flavor gives crispy omapodi.

Continue Reading »