Showing posts with label one pot. Show all posts

Wednesday, August 7, 2024

Paruppu Sadam | Thuvaram Paruppu Sadam

Paruppu Sadam, a delicious one pot meal made from rice and toor dal. It's one of the easiest meals that will be ready in under 30 minutes. 

Nowadays, many might be aware of the Coimbatore famous "Arisi Paruppu Sadam" and this paruppu sadam is so similar to that and is quite famous in Tirunelveli district. It's also known as "Thuvaram paruppu sadam" in order to differentiate it from the ulunthu sadam. 

When i was a kid, this rice was one of  my favorites and always asked Amma to pack this rice for lunch whenever she asked what to  make for a lunchbox. Also this paruppu sadam is one of the travel foods that we used to pack for our one day trip or temple visits. 


This paruppu sadam is the great example for the quote "Less is more" . Don't underestimate this recipe by looking at the basic ingredients list, together they make one delicious meal. 

Coconut is the main flavor of this recipe, so don't reduce the quantity of the coconut. I personally prefer coconut oil tempering for this rice because it enhances the flavor and taste so much. However, sesame oil tempering also works for this rice but i don't recommend any flavorless oil for this rice. 

This paruppu sadam tastes great on its own. Usually we have it with appalam, vathal and /or  thakkali pachadi. 

Around 2012, i posted this recipe on the blog. For the past few years, i have been wanting to update this post. Finally after more than a decade, today I updated the post with step by step procedure :-) 

Now let's check out on how to make this delicious Paruppu Sadam.


Paruppu Sadam | Thuvaram Paruppu Sadam

Preparation Time : 10 mins | Cooking Time : 20 mins | Serves : 2 
Recipe Category: One Pot Rice | Recipe Cuisine: Indian
Paruppu Sadam, Thuvaram Paruppu Sadam, Tirunelveli Paruppu Sadam Paruppu Sadam, a delicious one pot meal made from rice and toor dal. It's one of the easiest meals that will be ready in under 30 minutes.
Ingredients
Toor dal - 1/2 cup
Rice - 1 cup
Grated Coconut - 1/3 cup
Turmeric powder - 1/4 tsp
Red chili powder - 1/2 tsp
Asafoetida powder - 1/4 tsp
Salt - to taste
Tamarind - a small gooseberry size
To Temper 
Coconut oil - 1 tbsp
Mustard & urad dal - 1/2 tsp
Curry leaves - a few

Procedure
First soak the tamarind in 1/2 cup of water. Next rinse the rice in the water for a couple of times and soak it for 1/2 an hour. In a pressure cooker,add washed toor dal along with 3 cups of water. Add the asafoetida powder in it and bring into boil.

Let the dal boil for 5 mins and then add the spices(Turmeric powder, red chili powder),salt and the soaked rice(drained the soaked water).
Next add the tamarind juice extracted from the soaked tamarind and the grated coconut. Finally temper the ingredients listed under "To Temper" and add it into the pressure cooker.
Give a good mix and then put the lid and weight on the pressure cooker. Cook it for 3 whistles. 
Delicious Paruppu Satham/ Thuvaram Paruppu Satham is ready. Serve it with Thakkali Pachadi and appalam/vathal.

Related : How to make Ulunthu Soru / Black Urad Dal Sadam

Notes:
  • It tastes even more delicious when it completely cooked.
  • Thengai or kothamalli thogayal also taste great with this rice.

Continue Reading »

Wednesday, May 1, 2024

Masala Peas Pulao | Peas Pulao

Masala Peas Pulao, a delicious and easy to make one pot rice recipe. It's one of our family favorite meals. It tastes simply delicious with some raita on the sides. 

Some days when you're in a rush and want to make a yummy meal in under 30 mins, then i would highly recommend to give this recipe a try on those days. Also, it's perfect to pack for a one day trip or lunch boxes. If you have followed me on IG, you might already know how often i make this for lunch boxes and for a day out!


Rice 

In today's recipe, i have used seeraga samba rice. I simply love the flavor of this rice and it truly elevates the taste of the final dish without much effort :-) 

However, i make the same recipe with the basmati rice and it tastes equally good. So you can use whatever rice you have or prefer. For both the rice ,the soaking time and water quantity are the same.

Peas 

For this recipe, you can use frozen, fresh or dried peas. Here in this recipe, i have used the frozen peas . If you're using the dried peas, make sure to soak the peas for 6-8 hrs and then use it in this recipe.


Serving Suggestion

This Masala Peas Pulao tastes so good on its own, honestly it doesn't need any side dishes. With simple raita and/or with some store bought chips it would make a perfect meal.  So for a day trip, i simply pack this rice with some chips for our lunch. 
Sometimes, i would love to add a boiled egg to this meal to have a balanced and nutritional platter :-)

Now let's check out on how to make this delicious Masala Peas Pulao.

Masala Peas Pulao

Preparation Time : 20 mins | Cooking Time : 20 mins | Serves : 2 
Recipe Category: Pulao | Recipe Cuisine: Indian
Masala Peas Pulao, Peas Pulao,Peas Rice Masala Peas Pulao, a delicious and easy to make one pot rice recipe.
Ingredients
Seeraga Samba Rice - 1/2 cup
Frozen peas - 1/3 cup
Onion(small) -1
Tomato(medium) - 1 
Ginger garlic paste - 2 tsp
Turmeric powder - 1/4 tsp
Red chili powder - 1/2 tsp
Coriander powder - 1 tsp
Garam Masala powder - 1/2 tsp
Salt - to taste
Coriander leaves & mint - a handful
Curry leaves - a few 
Oil - 1 tbsp
Ghee - 1 tsp
Cinnamon - 1 inch piece
Cloves - 2 
Cardamom - 1
Water - 3/4 cup

Procedure
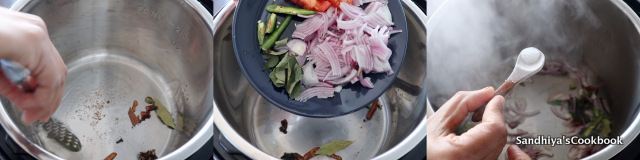
First wash and soak the rice in the water for 20 mins. In a pressure cooker, heat the oil, and add the whole spices(cinnamon, cloves and cardamom), saute it for 30 secs. Then add the thinly sliced onions and curry leaves, saute the onions till they are translucent.


Next add the ginger garlic paste and saute till it's aromatic then add the chopped tomatoes and cook till they are mushy. Then add all the spice powder(turmeric, red chili,coriander and garam masala powder) and salt. Saute the spices in the oil for 30 secs.
Then add the peas , give a quick stir and then add the water.
Bring the water into boil, drain the water from the soaked rice and add it into the boiling water. Finally add the chopped coriander and mint leaves.
Give a good mix , close the pressure cooker with lid and cook it for 2 whistles. 
Once the pressure is released naturally, add the ghee on top of the rice and gently fluff it up. 
Delicious Masala Peas Pulao is ready to serve.

Related: How to make Brinji Rice

Notes:
  • The above quantity of spice powder is for mild spice so adjust the spice powder as per your taste.
Continue Reading »

Friday, April 16, 2021

Instant Pot Chicken Biryani | Chicken Biryani

Instant Pot Chicken Biryani, making chicken biryani using Instant Pot is so effortless and the chicken biryani is so flavorful, delicious and fluffy ! 

Even since I bought(Nov 2020) the Instant pot, I have been using it mainly for making the biryani, soup and cooking lentils without soaking. Though i have been using it for many other cooking, these are my favorite to cook with Instant Pot. 

The one thing that I absolutely love about making the biryani in Instant pot is that nothing sticks or burns at the bottom of the pan. While making biryani in the traditional pressure cooker, i had the experience of burnt bottom, but so far in the last 6 months, i haven't burnt the biryani once in Instant pot :-) Hurray !! 
Instant Pot Chicken Biryani

Tips to make flavorful chicken biryani 

Compared to mutton, chicken itself doesn't have much flavor on its own, so in order to get the flavorful chicken biryani, the spices are really important. 
  • Make sure to use the whole spices in the tempering in addition to the garam masala powder.
  • I would highly recommend to use kalpasi if you can source it in your place. It surely brings out that restaurant style flavor. A little bit of kalpasi goes a long way here. So don't tempt to add more.
  • Use fresh mint and coriander leaves for great flavor.
  • Use chicken with bone for biryani, boneless chicken doesn't have much flavor, so is the biryani.

Related: How to make Restaurant Style Chicken 65

Instant Pot Chicken Biryani


Tips for making chicken biryani in Instant Pot

  • In Instant pot, we are going to pressure cook the rice for just 5 mins, so before adding the rice make sure that the chicken is at least half cooked so that the remaining get cooked while cooking the rice. 
  • You can cook the chicken in saute mode or just like me, you can pressure cook for just 2 minutes and do quick release.
  • Make sure to transfer the biryani to another pot once you opened the instant pot to avoid further cooking from the residual temperature of the pot and make it mushy.

Related: How to make Chicken Kebab


Instant Pot Chicken Biryani | IP Chicken Biryani

Preparation Time : 10 mins | Cooking Time : 10 mins | Serves : 2 
Recipe Category: Biryani | Recipe Cuisine: Indian
Instant Pot Chicken Biryani, IP Chicken Biryani, 10 mins IP Chicken Biryani Instant Pot Chicken Biryani, making chicken biryani using Instant Pot is so effortless and the chicken biryani is so flavorful, delicious and fluffy.
Ingredients
Chicken - 1 lb
Basmati rice - 1 cup
Onion -1 
Tomato - 1 
Curd - 1/4 cup
Green chili - 1
Mint - 1 handful
Coriander leaves - a handful
Curry leaves - few
Ginger garlic paste - 1 tbsp
Lemon juice - 1 tsp
Ghee - 2 tsp
Oil - 1 tbsp
Water - 1 & 1/2 cups
Salt - to taste
Whole Spices 
Bay leaf - 1
Cinnamon - 1/2 inch piece
Cloves - 3 
Green Cardamom - 2
Black Cardamom -1(optional)
*Kalpasi - a small piece(optional)
Star anise - 1/2 
Nutmeg powder - 1/4 tsp
Spice Powder 
Red chili powder - 3/4 tsp
Turmeric - 1/4 tsp
Garam Masala powder - 1 tsp(optional)
* If you can't source kalpasi, skip it.


Instant Pot Chicken Biryani
Procedure
First soak the rice for 45 mins to 1 hr. Turn on the instant pot in saute mode, add the oil and add all the whole spices and grate some nutmeg(since i don't have nutmeg powder). 
Saute all the spices in the oil until they are aromatic(it's really important and gives great flavor to the biryani), then add onions, curry leaves and green chili with a bit of salt. 
Saute till the onions are transparent, then add the chicken, ginger garlic paste.
Next add the  tomatoes and mint leaves.  Saute till the ginger garlic paste is fragrant and then add all the spices.
Next, add the  curd & salt (just for chicken), mix it all well together and then add 1/2 cup of water &   give a quick mix. 
Close the Instant pot with lid and keep the whistle in sealing position. Cancel the saute mode and select the manual mode and set the timer for 2 mins. Once the time is up, cancel the warm mode. 
Wait for 2 mins and quickly release the pressure manually. Next add the remaining 1 cup of water and required salt for the biryani and then drain the soaked water from the rice and add the rice. 
Give a gentle mix. Add the salt for rice and finally squeeze the lemon juice  and Cover the Instant pot with lid and keep the whistle in sealing position.
Select the manual mode and set the timer for 5 mins. Once the time is up, cancel the warm mode and wait for 2 mins and quickly release the pressure manually. 
Sprinkle some coriander leaves  and drizzle the ghee on the top. Gently fluff it up and transfer to an another pot. 

Tasty Instant Pot Chicken Biryani is ready ! Serve it with Onion Raita

Related: How to make Boiled Eggs in Instant Pot 

Instant Pot Chicken Biryani
Notes: 
  • In this recipe, i haven't used garam masala. 
  • Adding ghee at the last enhance the flavor of biryani.
  • I have used India gate basmati rice
  • Soaking the rice for longer time is really important to get well cooked & fluffy biryani.
  • Once the time is up, wait for at least 2 mins before quick release the pressure. 
Instant Pot Chicken Biryani

Continue Reading »

Friday, May 1, 2020

Salmon Fish Biryani | Fish Dum Biryani

Salmon Fish Biryani, a aromatic and scrumptious one pot rice made from basmati rice, fish and indian spices. When it comes to biryani, fish biryani is not that common in our household compared to chicken and mutton biryani. It's one of my recent favorite biryani and it's been on repeat mode in my kitchen for a while now because of high demand. 

For today's biryani, i have used salmon fish which is our most favorite fish available here.  But any fleshy fish can be used in the same way to make yummy biryani. Vanjiram/king fish and tilapia fish also works well for this recipe. If you're fish lover and want something comforting and light on your weekend meal, then you must try this. Unless chicken and mutton biryani, it doesn't feel heavy after the meal.

Ever since, i had bought the cast iron pan, i have been trying all kind of one pot rice/biryani with it. It's perfect to make rice dishes in dum style. Totally love the way the rice get cooked in this dum method. Perfectly fluffy without any mushiness even at the bottom of the pan. I know that I'm repeating it whenever  share any dum recipes recently, because i'm totally in love with dum cooking method as of now and if you haven't tried making biryani in dum style, do give it a try. 

Dum cooking is nothing but trapping the steam inside the vessel and cook it on low flame. All you need is some heavy pot with lid and some weight to put on the lid for dum cooking. See the notes sections for more details if you're making dum style biryani for first time. Now let's check out how to make this delicious fish dum biryani.


Salmon Fish Biryani | Fish Dum Biryani

Preparation Time : 30 mins | Cooking Time : 25 mins | Serves : 2 to 3 
Recipe Category: Biryani | Recipe Cuisine: Indian
Salmon Fish Biryani, Fish Biryani,Dum Biryani,Salmon Fish, Biryani Recipe, Best Fish Biryani,Meen Biryani Salmon Fish Biryani, a aromatic and scrumptious one pot rice made from basmati rice, fish and indian spices.
Ingredients
Basmati Rice - 1 cup
Onion(medium) - 1
Tomato - 1/2( medium size)
Ginger garlic paste  - 1 tbsp
Mint & Coriander leaves - handful
Turmeric powder - pinch
Red chili powder - 1 tsp
Garam masala - 1 tsp
Cloves - 2 nos
Cinnamon - small piece
Cardamom - 1 no
Bay leaf -1 
Star anise - 1 
Ghee  - 1 tbsp
Oil - 1 tbsp
Water - 2 cup
Curd - 2 tbsp
Salt- to taste
To Marinate 
Salmon Fish - 1/2 lb
Red chili powder - 1/2 tsp
Coriander powder - 2 tsp
Turmeric powder - 1/4 tsp
Ginger garlic paste - 1/2 tbsp
Lemon Juice - 1 tsp
Salt - to taste

Procedure
Soak the rice for 30 mins. Marinate the fish with the ingredients listed under "To marinate" & let it marinate for 30 mins - 1 hr. Slice the onions thinly and slit the green chili and cut the tomatoes into small pieces.
Heat a thick bottom pan( here i'm using my cast iron pan) with 1/2 tbsp of oil and add half of the onions.Saute till the onions are brown in medium flame and remove it on the plate.
In the same pan, add the remaining oil and pan fried the fish till they are golden brown on both sides and keep it aside.
In the same pan, add the whole gram masala spices(cinnamon, cardamom, cloves, bayleaf & star anise). And then add the remaining onions & saute, once the onions become translucent.
Next add the tomatoes, mint, coriander leaves & ginger garlic paste, saute till the raw smell of ginger garlic paste are gone and then add the curd & spice powder(turmeric, red chili & garam masala powder) give a good mix.
Cover the kadai with lid and cook the masala till they are aromatic and the raw smells are gone.
Add water and salt & bring into boil.
Discard water from the soaked rice & add into the water and let it boil for 2-3 mins.
Once the water is almost absorbed by the rice and it's almost cooked, place the fried fish on top of the rice.
Cover the kadai with lid and put on some weight to avoid the steam to escape and let it cook for 5 mins in low and keep it covered and undisturbed for another 15 mins. Then open the lid and add the fried onions,ghee and some coriander leaves on top. 
Delicious Fish Biryani is ready. Serve it with simple raita. For  salmon fish fry recipe, check out here & here or looking for more non veg recipe, check out here
Notes:
  • Remember that the fish has already seasoned well, so when you season the water, don't over do it.
  • Make sure to use pot/pan has heavy bottom otherwise it's easily get burned at the bottom.
  • After pan fried the fish, make biryani in the same pan without washing, the flavor from the fired fish makes the rice more tasty 
  • Adding ghee at last gives great flavor to the biryani.
  • To avoid the escape of steam, you can use any weight on top of the lid. If your lid is flat, even pot filled with water on the top works fine for making dum effect.
  • Don't open the pot at once when the stove is switched off, keep it covered at least for 10 - 15 mins before opening the pot.
  • Here i have used 2 cups of water for 1 cup of basmati rice.
  • I have used skinless salmon fish for this biryani

Continue Reading »