
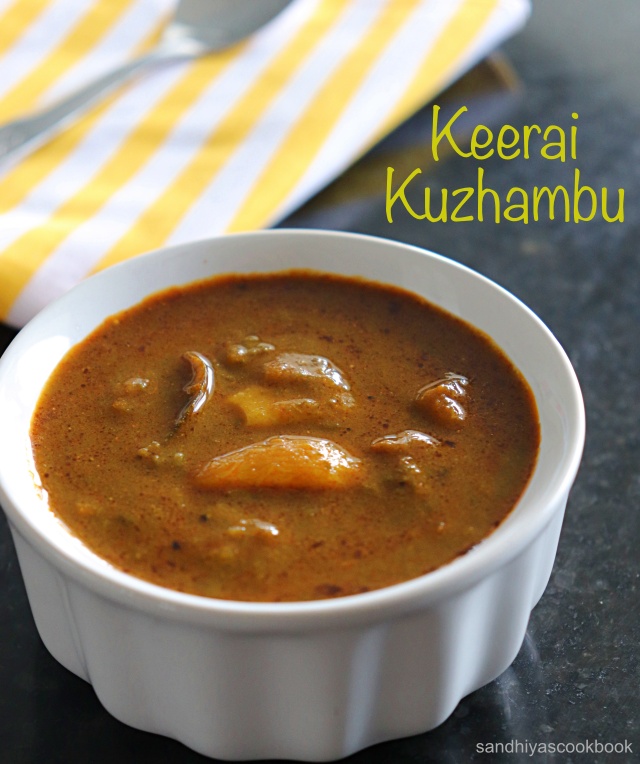
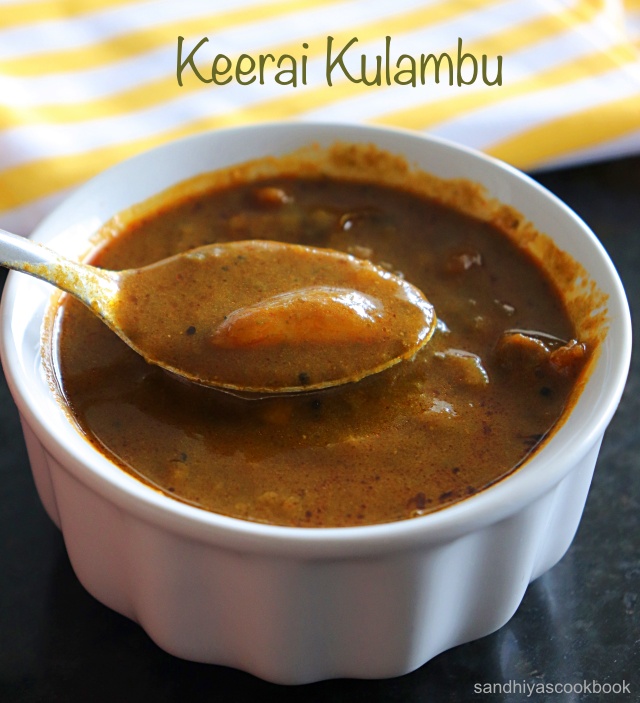
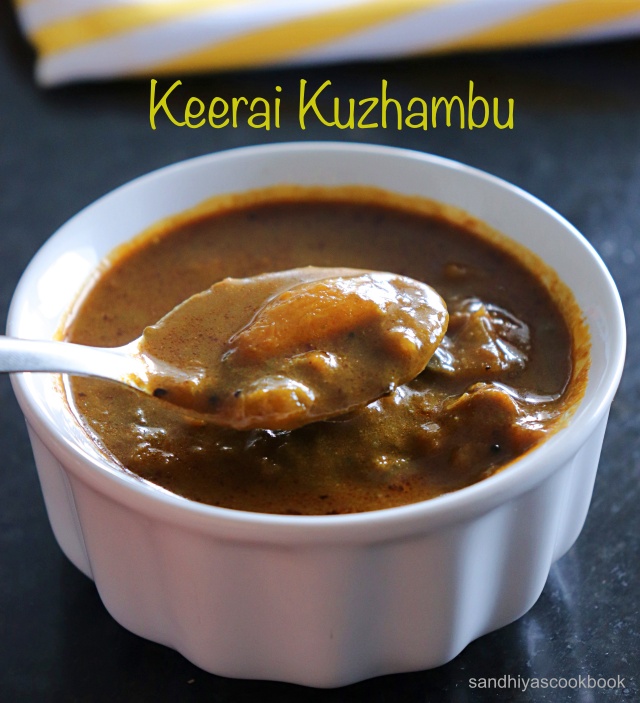
Keerai Kuzhambu / Keerai Puli Kuzhambu, a spicy and delicious tamarind based curry with spinach puree. It's one of my favourite curries and often make it for our lunch long with steamed rice and an accompaniment.

Continue Reading »
This curry preparation is more or less similar to the puli kuzhambu/kara kuzhambu, but the addition of spinach puree gives a unique taste and it's indeed finger licking delicious.
In our home, ST is more fond of spicy masala food hence the keerai kootu and keerai kadaiyal are some of his least favourite dishes and claim them as very bland. In general, most of the South Indian dishes made with spinach are very mild in terms of flavor and spices.
So he prefers this keerai kuzhambu more than any other dishes made with spinach! if you're one of the person who likes your food as spicy and flavorful, then this curry is definitely for you !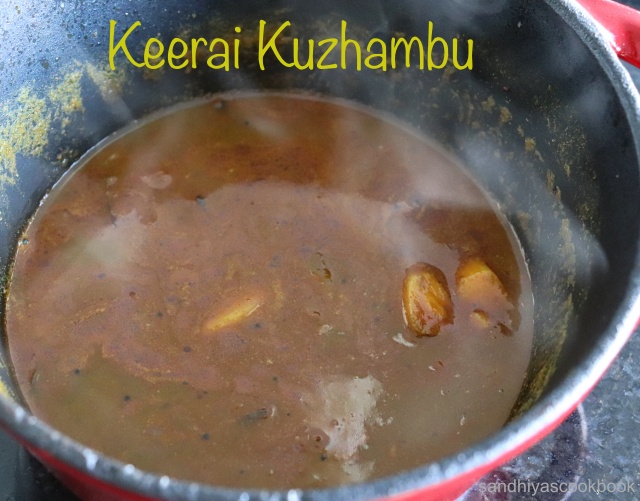

Keerai Kuzhambu | Keerai Puli Kuzhambu
Preparation Time : 20 mins | Cooking Time : 20 mins | Serves : 2
Recipe Category: Curry | Recipe Cuisine: Indian
Recipe Category: Curry | Recipe Cuisine: Indian
Ingredients
Spinach - 1 cup (tightly packed)
Tamarind - a gooseberry size
Pearl onion - 4
Garlic - 8 pods
Tomato(small) - 1
Curry leaves - few
Fenugreek Seed - 1/2 tsp
Red Chili powder - 1/2 tsp
Sambar powder - 2 tsp
Turmeric powder - 1/4 tsp
Salt - to taste
Oil - 1& 1/2 tbsp
Mustard & urad dal - 1/4 tsp
Jaggery - a small piece
Pearl onion - 4
Garlic - 8 pods
Tomato(small) - 1
Curry leaves - few
Fenugreek Seed - 1/2 tsp
Red Chili powder - 1/2 tsp
Sambar powder - 2 tsp
Turmeric powder - 1/4 tsp
Salt - to taste
Oil - 1& 1/2 tbsp
Mustard & urad dal - 1/4 tsp
Jaggery - a small piece

Procedure
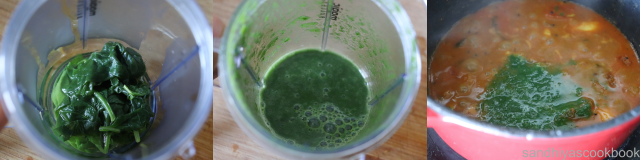
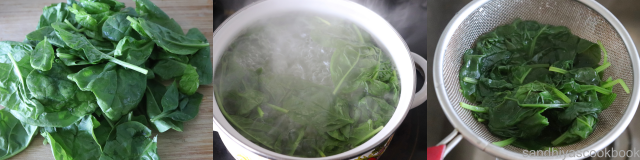
First measure and take the spinach. Heat a pot of water and blanch the spinach. Just when it starts to shrink, remove from the hot water and run it under cool water & keep it aside.

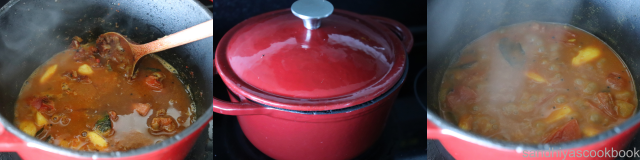
Peel the onion & garlic and chop them roughly into pieces and also tomato into small pieces. Soak the tamarind in a 1/2 cup of water for 20 mins. Heat the oil in a thick bottomed pan.

Add the fenugreek seed, mustard & urad dal, let the mustard splutter, then add the onion, garlic and curry leaves.Saute till the onions become translucent.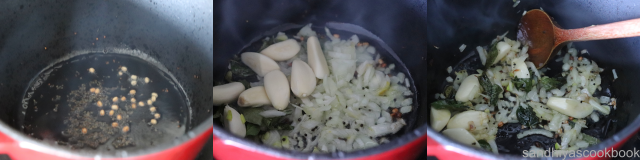

Then add the tomatoes and give a quick stir. Next keep the flame in low and then add the spices(turmeric, red chili & sambar powder) and salt ,saute them in the oil for few mins.

Extract the tamarind juice from the soaked tamarind and add into it. Cover it with lid and cook till the curry is little thick.

In the meantime, puree the blanched spinach and add it into the curry.

Mix it well and then finally add a piece of jaggery. Boil the curry till the oil separates on the sides.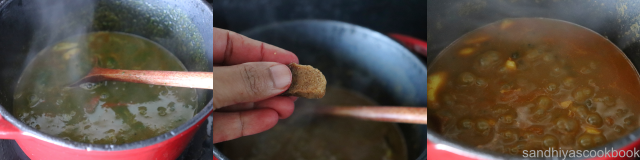

Tasty Keerai Kuzhambu is ready ! Serve it with steamed rice and your favorite curry. We had it along with potato podimas, beetroot poriyal and tempered toor dal.
Related : How to make Keerai Kootu

Notes:
- Keep the flame in low when adding the spices, otherwise it will be burnt easily.
- Adding the spices in the oil gives enhanced flavor to the kuzhambu.
- Sambar powder that i have used here is home made and haven't had any chilies in it. If your sambar powder has chili in it, reduce the chili powder and adjust to your taste.
- Boil the curry till the consistency you prefer.


